Pins are light sources that can be placed into the HDRI to further enhance the image file, and give the desired lighting effect on the object scene.
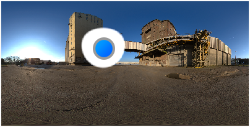
1. HDRI Preview
The HDRI Preview enables you to select and adjust positions of the individual pins. Right click on a pin will bring up a context menu, where you have easy access to the options for that pin.
2. Pin List
Contains all the pins created in the HDRI editor. You can enable or disable a pin by clicking the checkbox to the left of its name. You can rename a pin by double clicking its name. Right click pins for options to delete or duplicate. The active pin being edited will be highlighted blue in the list and will be marked by a blue dot in the preview.
3. Pin Options
Add Pin
To Add a pin click one of the options above the Pin List, these include Add Pin, Add Gradient Pin, Add Image Pin, and Add Copy Pin. The Pin types will be described in the following section on this page.
The new pin will be displayed in the Pin List as well as the HDRI preview. To make a pin active for editing, select it in the Pin List or click on the pin handle in the preview window. Drag the pins by their handles to position them. The “Add Highlight”-pin is explained below in the “Set Highlight” section.
You can also copy a pin from one environment to another. Just select the pin press Ctrl+C/Cmd+C, go the the destination environment, click in the HDRI editor and press Cmd+V/Cmd+V.
Delete Pin
Click on the trash can icon to delete the active pin.
Move Pin Up/Down
Click on the arrows to change the pin order in the pin list. The order is important as it will display and layer pins from the top down.
Pin Folders
Use pin folders to organize all your pins in your HDRI. Click on the “Add Folder” icon to add a folder to the list and drag pins into the folder.
Set Highlight
With the Set Highlight option you can create your pin by selecting a region on the model you want to highlight. Simply CTRL+Click/CMD+Click in the Real Time View anywhere on the surface of the model and a pin will be generated facing that point on the surface. When finished, click “Done.” Pins added this way can be edited as normal.
To set an existing highlight click onto “Set Highlight”, and then select an existing pin in the editor. Click on the object to set the highlight using the selected pin, and use your left mouse button to drag it into the right position.
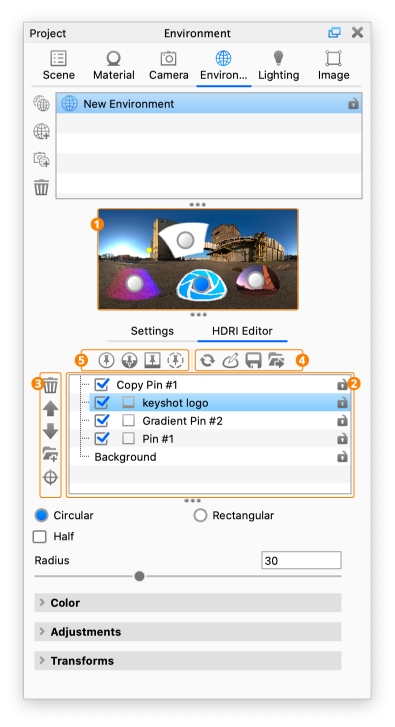
4. Editor Options
![]() Generate Full Resolution HDRI
Generate Full Resolution HDRI
While you are editing the pins the environment is using a “fast preview” mode, where you don’t see the full effect of the changes- click ![]() to force the environment to be displayed in the full resolution.
to force the environment to be displayed in the full resolution.
Tip
If the environment has not been generated in full resolution, it will be indicated in the top right corner of the Real-time View ![]() this indicator can also be clicked to force the environment to be displayed in the full resolution.
this indicator can also be clicked to force the environment to be displayed in the full resolution.
HDRI Editor Canvas
This will launch the HDRI editor window, where you can edit the pins on a bigger canvas.
Save Environment
Here you can save your environment to the Library. Note that it is only the HDRI settings that are saved with the environment, not the general Environment Settings as these are scene specific.
Export Environment
This enables you to export a .HDR/.EXR/.HDZ with your environment.
5. Pin Types
The environment is made up from a background and a number of pins. The background is described in detail here: HDRI Editor Background
 Standard Pin
Add Pin creates a pin in the center of the unfolded HDRI. Grab it to place it in the desired location.
Circular/Rectangular – This will toggle the shape of the pin. This is crucial when creating very specific shapes and reflections in your renderings.
Half – For either pin shape you can select the shape to be cut in half. This will cut the pin in half. All adjustments will work the same except that you are now only seeing half of the pin.
Radius (Circular) – This determines the pin size of circular pins.
Width/Height/Angle (Rectangular) – This determines the shape and size of rectangular pins.
Color
- Brightness – Use this to adjust the overall intensity of the pin light.
- Color – Use this to set what color the pin will project. For accurate real-world lighting, use the Kelvin scale.
- Blend Mode – With this option, choose different ways to have the pins blend and interact with each other. Pin order in the list becomes very important with this function
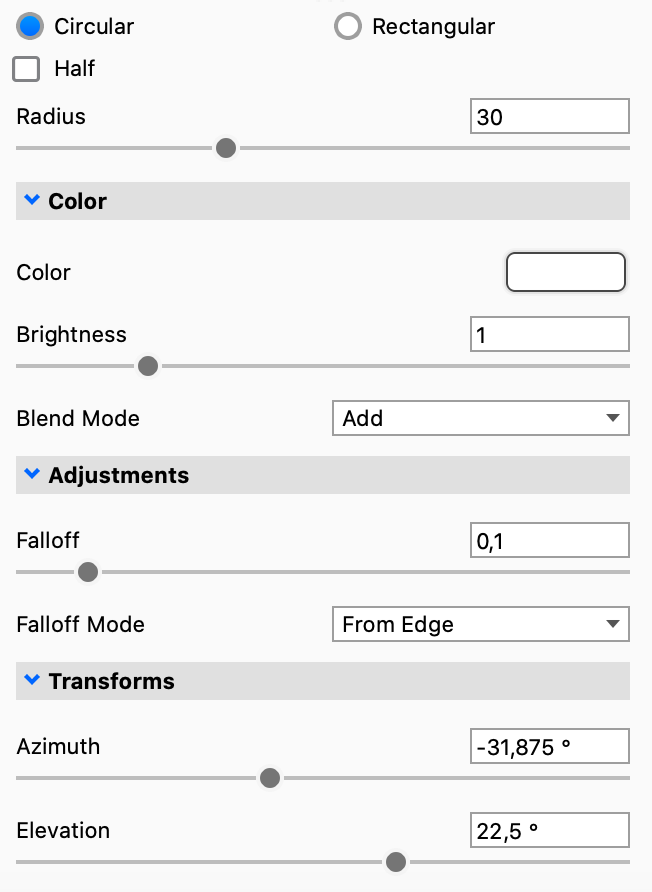
Adjustments
- Angle – The angle slider lets you rotate the pin (Rectangular pins only)
- Rounded corner – This will let you round the corners on the pin (Rectangular pins only)
- Falloff Mode – This controls the falloff of the light from the center of the pin. Different modes have different behaviors. You can see the effect of the various modes both in the editor as well as in the KeyShot Studio Real-Time View.
- Falloff – This controls the softness of edge of the pin light. Increase the falloff for more blended, softer edges.
Transforms
- Azimuth – Sets the horizontal position of the pin.
- Elevation – Sets the height of the pin.
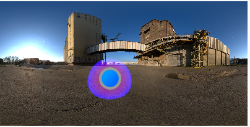
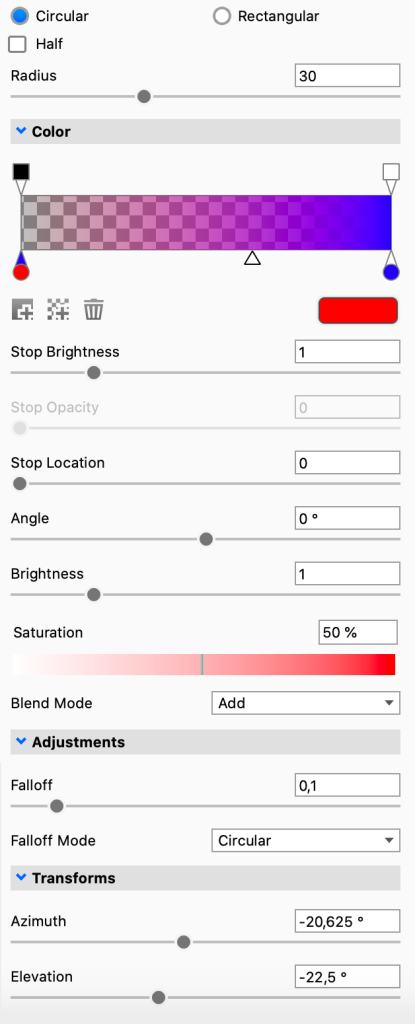
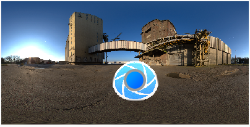
 Gradient Pin
A Gradient Pin allows you to place a light source with color and opacity variations.
Circular/Rectangular – This will toggle the shape of the pin. This is crucial when creating very specific shapes and reflections in your renderings.
Half – For either pin shape you can select the shape to be cut in half. This will cut the pin in half. All adjustments will work the same except that you are now only seeing half of the pin.
Radius (Circular) – This determines the pin size of circular pins.
Width/Height/Angle (Rectangular) – This determines the shape and size of rectangular pins.
Color
- Color Bar – Here you can set up the color gradient by selecting/adding colors and opacity levels, and dragging them to position.
- The drop shaped stops are Color stops. Click to select it, then use the color swatch to choose a color (or Double click it). To add another color to the gradient, click the

- The small triangles between colors show where the 2 colors are mixed 50-50 and they can be dragged to control the course of the blend.
- The Square stops above the color bar are Opacity stops, which enable you to add opacity to the gradient.
icon. Click To add an Opacity stop.
 - Delete color/opacity stop by selecting it and clicking the
 Trash icon.
 - The Stop color, brightness, opacity and location determine the location and appearance of the selected stop.
- The drop shaped stops are Color stops. Click to select it, then use the color swatch to choose a color (or Double click it). To add another color to the gradient, click the
- Brightness – Use this to adjust the overall intensity of the pin light.
- Saturation – This lets you set the saturation of the entire gradient
- Blend Mode – With this option, choose different ways to have the pins blend and interact with each other. Pin order becomes very important with this function
Adjustments
- Angle – The angle slider lets you rotate the pin (Rectangular pins only)
- Rounded corner – This will let you round the corners on the pin (Rectangular pins only)
- Falloff Mode – This controls the falloff of the light from the center of the pin. Different modes have different behaviors. You can see the effect of the various modes both in the editor as well as in the KeyShot Studio Real-Time View.
- Falloff – This controls the softness of edge of the pin light. Increase the falloff for more blended, softer edges.
Transforms
- Azimuth – Sets the horizontal position of the pin.
- Elevation – Sets the height of the pin.
 Copy Pin
When this options is selected, a snapshot of a section of the background is used as a new pin. A pin handle and a marker of the copy-origin (yellow dot) will appear on the preview window.
After creating the copy pin, move the pin by the handle to place it where desired. Adjustment sliders similar to those used with the regular pin will be available with the same effects.

Color
- Blend Mode – With this option, choose different ways to have the pins blend and interact with each other. Pin order becomes very important with this function
- Brightness – Use this to adjust the intensity of the pin light.
- Contrast – Use this to adjust the contrast of the pin light.
- Saturation – Use this to adjust the saturation of the pin light.
- Hue – Use this to adjust the hue of the pin light.
- Colorize – With this you can add a color overlay to the pin.
- Azimuth – Sets the horizontal position of the point the pin is copied from (yellow dot).
- Inclination – Sets the height of the point the pin is copied from (yellow dot).
Adjustments
- Angle – The angle slider lets you rotate the pin (Rectangular pins only)
- Rounded corner – This will let you round the corners on the pin (Rectangular pins only)
- Falloff Mode – This controls the falloff of the light from the center of the pin. Different modes have different behaviors. You can see the effect of the various modes both in the editor as well as in the KeyShot Studio Real-Time View.
- Falloff – This controls the softness of edge of the pin light. Increase the falloff for more blended, softer edges.
Transforms
- Azimuth – Sets the horizontal position of the pin.
- Elevation – Sets the height of the pin.

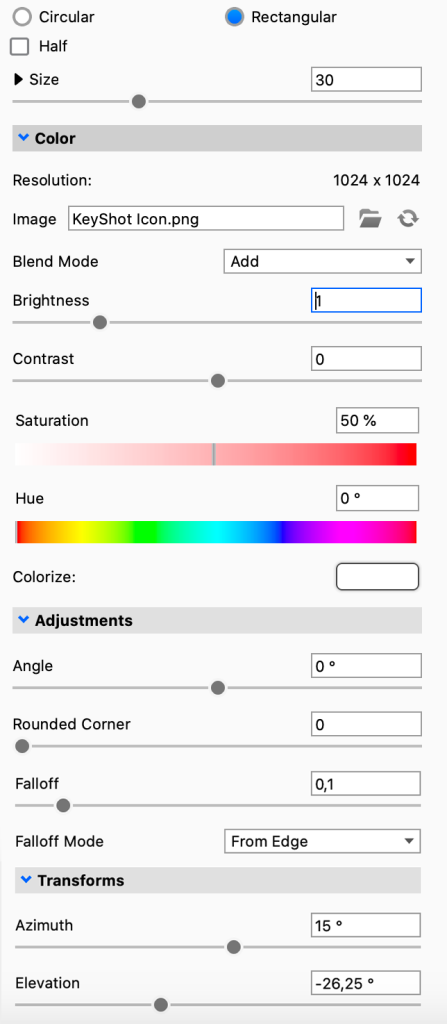
 Image Pin
The image pin allows you to use HDR, HDZ, EXR, JPG, PNG, JPEG, and BMP as a pin. There are limitless usages for this pin, such as creating specific reflections, simulating a lighting array and using part of an HDR with another HDR among others.
When adding an image pin, you will prompted to select an image to be used. Once selected, the image will be placed in the preview window. You can also drag an image onto the HDRI editor and it will be added as an image pin.
Adjustment sliders will be available to edit the image pin. These sliders are similar to the regular pin sliders.
Color
- Resolution – Shows the resolution of the current Image pin
- Image – Shows the name of the current image used for the pin. Hovering will show you the entire path to the file
 Browse for another image file
 Refresh the image file
- Blend Mode – With this option, choose different ways to have the pins blend and interact with each other. Pin order becomes very important with this function
- Brightness – Use this to adjust the intensity of the pin light.
- Contrast – Use this to adjust the contrast of the pin light.
- Saturation – Use this to adjust the saturation of the pin light.
- Hue – Use this to adjust the hue of the pin light.
- Colorize – With this you can add a color overlay to the pin.
Adjustments
- Angle – The angle slider lets you rotate the image pin (Rectangular pins only)
- Rounded corner – This will let you round the corners on the image pin (Rectangular pins only)
- Falloff Mode – This controls the falloff of the light from the center of the pin. Different modes have different behaviors. You can see the effect of the various modes both in the editor as well as in the KeyShot Studio Real-Time View.
- Falloff – This controls the softness of edge of the pin light. Increase the falloff for more blended, softer edges.
Transforms
- Azimuth – Sets the horizontal position of the pin.
- Elevation – Sets the height of the pin.