The instructions below will take you through the registration process for floating licenses.
KeyShot Pro Floating Setup Instructions
1. Download and install the KeyShot Pro Floating application. To download KeyShot, click here.
2. Launch KeyShot.
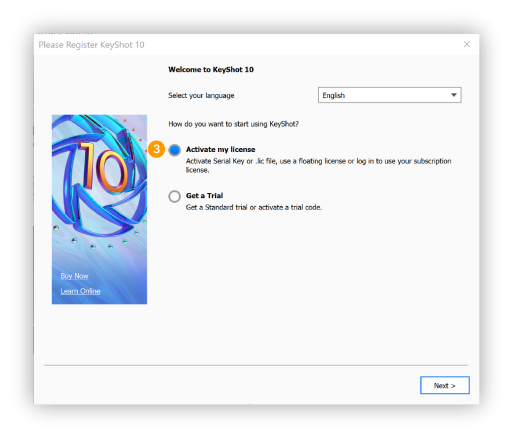
3. Select Activate my license and click Next.

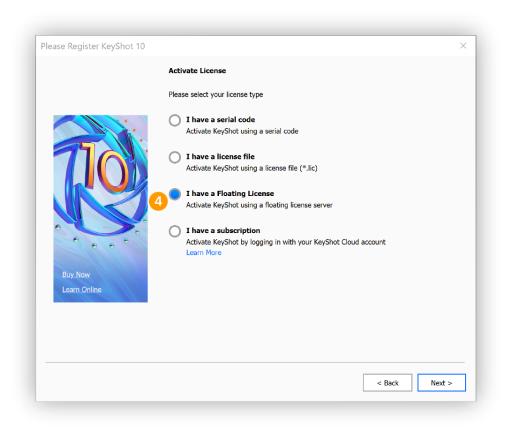
4. Select I have Floating License and click Next.

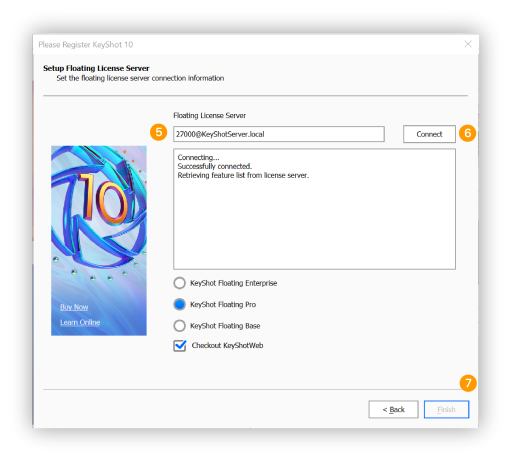
5. Enter the hostname or IP address of your license server. If the server uses another FlexLM port than the standard (27000) you need to specify the port number, followed by the “@” sign and the server’s hostname or IP address.
For example:
- Hostname: 27000@KeyShotServer.local
- IP Address: 27000@192.168.1.123
6. Click Connect.
7. Review your license features, select the type of license you want to use and if you need KeyShotWeb and Click Finish.

KeyShot Pro Floating will start. From now on KeyShot will remember the server information. You will be able to check out the license as long as your system can connect to the computer acting as the license server.
Switching to another floating license
If you have multiple floating licenses, you can switch between them in the floating license settings. You can trigger the floating license settings window from the main menu.
- Windows: Help > Floating license settings…
- Mac: KeyShot > Floating license settings…
Choose the required floating license and restart KeyShot.
Switching from another license type
If you need to switch from a trial or another license type you can trigger the registration dialog from the main menu.
- Windows: Help > Activate license…
- Mac: KeyShot > Activate license…
And jump to step 3 in the guide above.
Note
If your service status window does not look similar to the above image or if you are getting an error message when you start the server, you can use the troubleshooting guide for diagnosis.