What is it?
KeyShot Viewer is a free, stand-alone, touch-enabled, desktop application for Mac and Windows that enables KeyShot scenes to be securely shared with anyone for interactive viewing, presentation and configuration. KeyShot Viewer uses the same CPU-powered ray-tracing render engine as KeyShot to produce amazing photo-realistic visuals in real-time.
How it Works
Saving for KeyShot Viewer
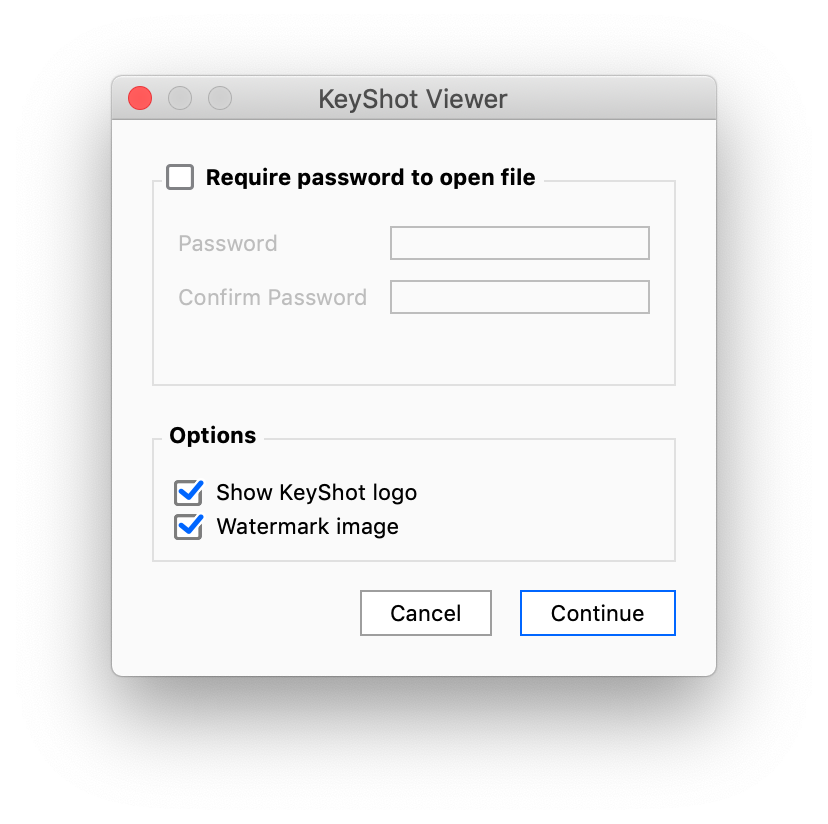
KeyShot Viewer enables you to share a scene with someone who doesn’t have KeyShot. You can share regular scenes, as well as Configurator scenes. The viewer can open regular KSP files, but you can also Save For KeyShot Viewer, which will allow you to password protect the scene and/or add logo and watermark overlays to the scene.
Downloading, Installing, and Opening Files
KeyShot Viewer can be downloaded at keyshot.com/viewer by entering your name and email address. Once KeyShot Viewer is installed you will be able to open any KeyShot Package file (.ksp) to interact with the scene.
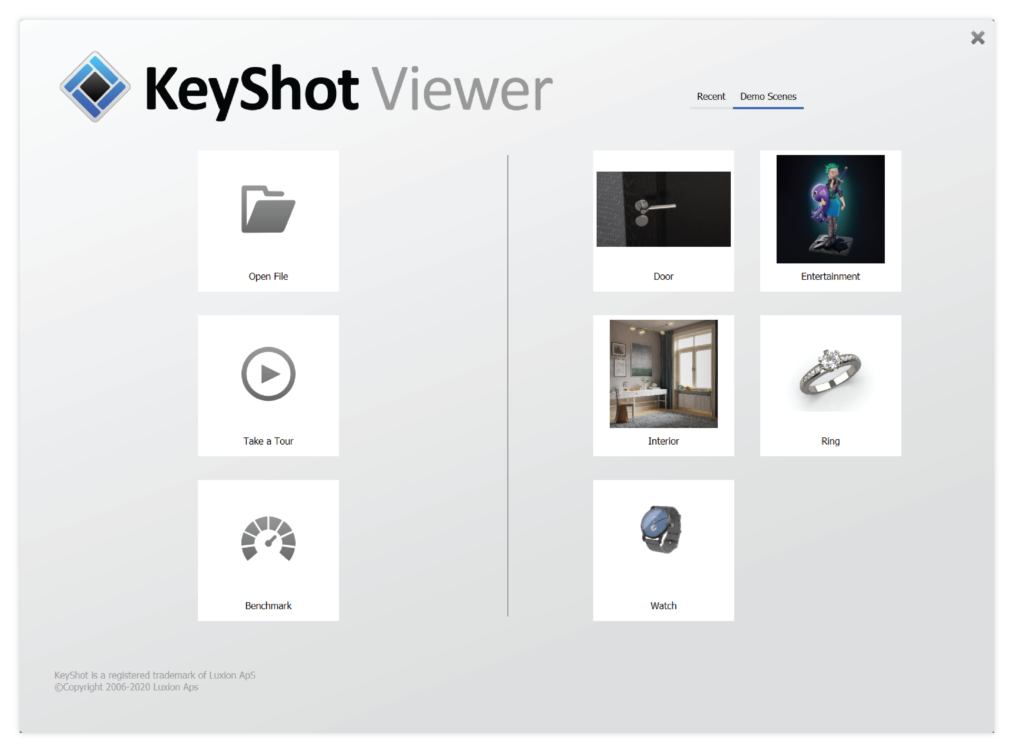
When KeyShot Viewer is launched you will be prompted with a splash screen where you can browse to open a file, take a tour, run benchmark mode, select from those recently opened, or open a demo scene.
You can also open .ksp files by dragging and dropping onto the splash screen, into the KeyShot Viewer application window, or by the file menu if a scene is currently open.
The file menu is accessible when the application is in a windowed state, which can be reached from full-screen presentation mode by pressing the Esc key or clicking the ![]() exit icon. To enter full-screen presentation mode again, maximize the window or click the
exit icon. To enter full-screen presentation mode again, maximize the window or click the ![]() presentation mode icon.
presentation mode icon.
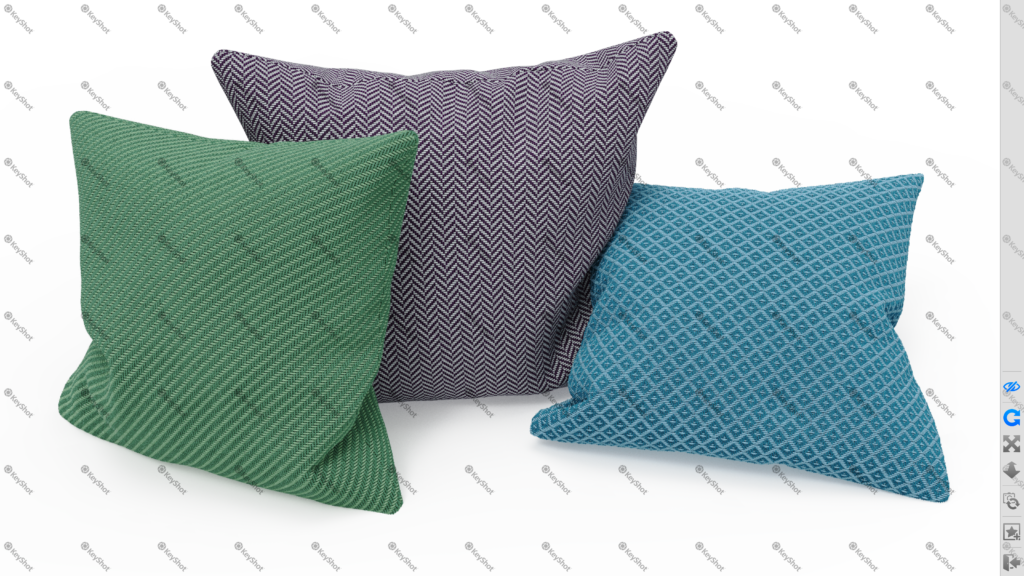
KeyShot viewer comes with several demo scenes. Additional configurator scenes can be found here.
Benchmark Mode
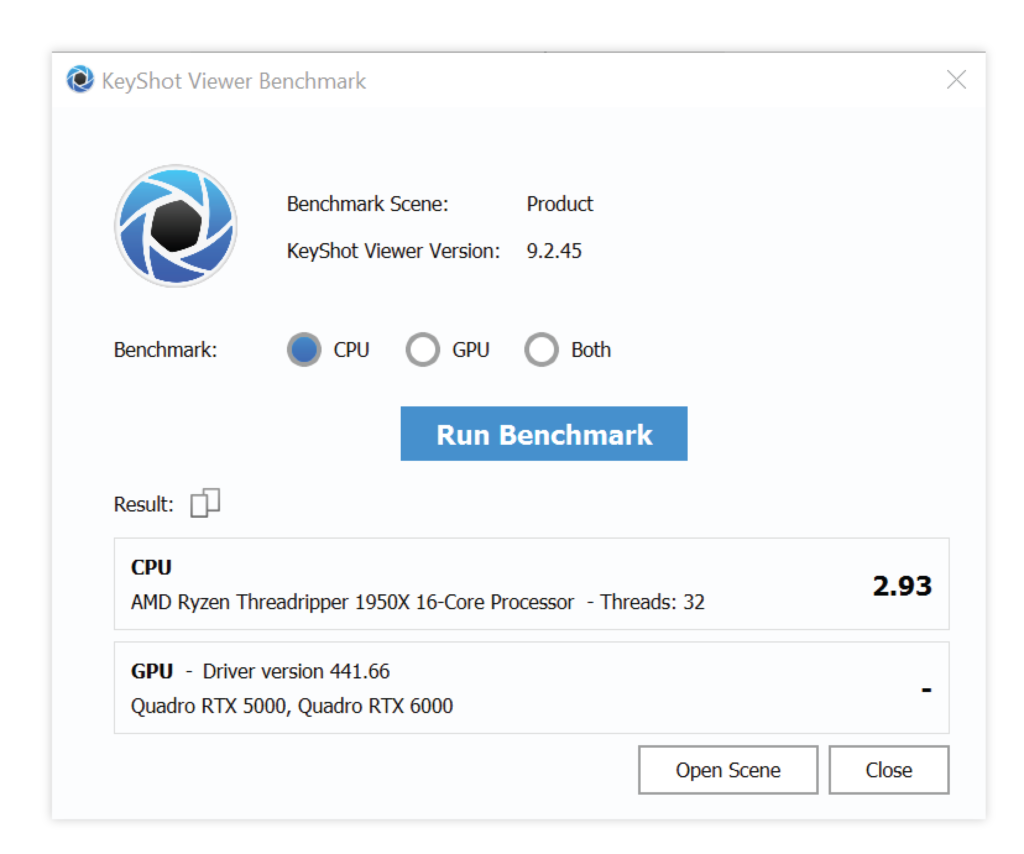
KeyShot Viewer has the ability to run benchmark scenes and report feedback for independent CPU and GPU testing, as well as combined CPU and GPU testing.
The Benchmark scene is not included in KeyShot Viewer, but is downloaded on demand when you click Benchmark in the splash screen. After download, the KeyShot Viewer Benchmark window will launch.
Note
It’s important to close all other running applications before you run the benchmark.
Running the Benchmark:
You can choose to run a benchmark test for CPU, GPU, or both. Choose one of those options, then select Run Benchmark. A window showing the progress of the benchmark test will open.
Comparing Results:
To get a realistic base for comparing benchmark scores, make sure they are generated on the same version of KeyShot VIewer. Results will be shown in the KeyShot Viewer Benchmark window under either CPU, GPU, or both, depending on what test was run. The resulting numbers are multiples based on render time. A score of 1.0 is based on an Intel(R) Core(TM) i7-6900K CPU @3.20GHz, 2601 Mhz, 8 Core(s).
For example, a system with the same rendering speed as the machine listed above would have a factor of 1.0.
A CPU that is double that speed would result in a factor of 2.0.
The GPU benchmark follows the same CPU baseline. However, the significant differences in the technologies between CPU and GPU make comparison difficult and should be taken lightly.
Any differences in the resulting numbers between several different benchmark tests are likely due to different loads on the computer, such as other applications running in the background.
Moving the Camera View
The option to add watermark and powered by KeyShot is included when exporting a KeyShot Scene for KeyShot Viewer.
When you move the camera view or make changes the scene will update instantly – with the image quality improving as you let it sit until 256 samples has been reached.
To move the view, simply use your mouse or finger on a touch-enabled device. The toolbar has three icons indicating if ![]() tumble,
tumble, ![]() pan, or
pan, or ![]() dolly is active for the left mouse button or single-finger input.
dolly is active for the left mouse button or single-finger input.
If you’re using a mouse you can also pan using the middle mouse button and dolly using the middle mouse wheel or by scrolling on a touch-pad. To reset the view click the camera reset icon on the toolbar.
Studio, Model, and Material variations
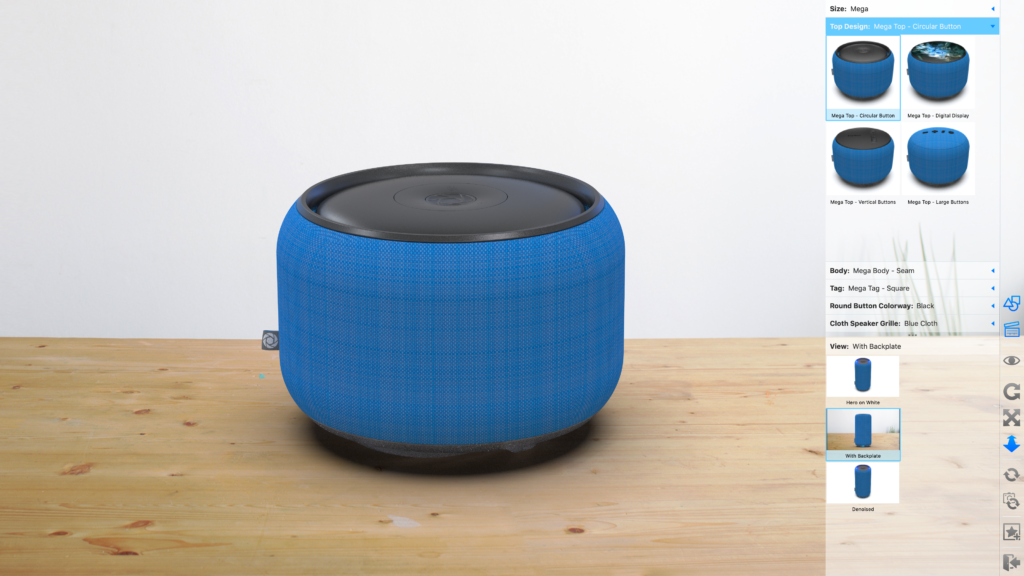
Users of KeyShot Pro can use the Configurator to include Studio, Model, and Material variations, which will be available when KeyShot Viewer is in full-screen presentation mode. Simply click or tap on any of these variations to update the real-time view. Use the tabs to navigate the various options that have been setup in the scene.
For information about using the Configurator in KeyShot Pro, to setup Studio, Model, and Material variations for output to KeyShot Viewer click here.
The ![]() auto-hide icon allows you to hide the Studio, Model and Material variation panels after 10 seconds of inactivity. To show again simply mouse over or tap in the area the panels occupy.
auto-hide icon allows you to hide the Studio, Model and Material variation panels after 10 seconds of inactivity. To show again simply mouse over or tap in the area the panels occupy.
Taking a Screenshot
If included in your scene, click or tap the ![]() screenshot icon on the toolbar to save an image. If your scene includes watermarking it will also be included in screenshot output; however, the UI panels will not.
screenshot icon on the toolbar to save an image. If your scene includes watermarking it will also be included in screenshot output; however, the UI panels will not.
By default screenshots will be saved in your documents folder. In Preferences you can select another destination folder or choose or choose to be asked for destination every time you take a screenshot. To find find Preferences on Windows click Edit, Preferences… and on Mac Keyshot, Preferences…
The Viewer can also output a metadata file in XMP or .meta format. The metadata file indicates which variations are active along with camera information that can be referenced to make changes to the original scene back in KeyShot. You enable/disable metadata output in preferences, where you can also choose the format by clicking the ![]() gear icon.
gear icon.
FAQs
- How do I remove the watermark logo pattern?
The inclusion of the KeyShot watermark logo pattern is defined when saving for KeyShot Viewer from KeyShot Pro. You will need to ask the provider of the file to remove this. - How do I remove the “Powered by KeyShot” logo in the upper right corner?
The inclusion of the “powered by KeyShot” logo is defined when saving for KeyShot Viewer from KeyShot Pro. You will need to ask the provider of the file to remove this. - I see a message “Camera is locked”. How do I unlock it?
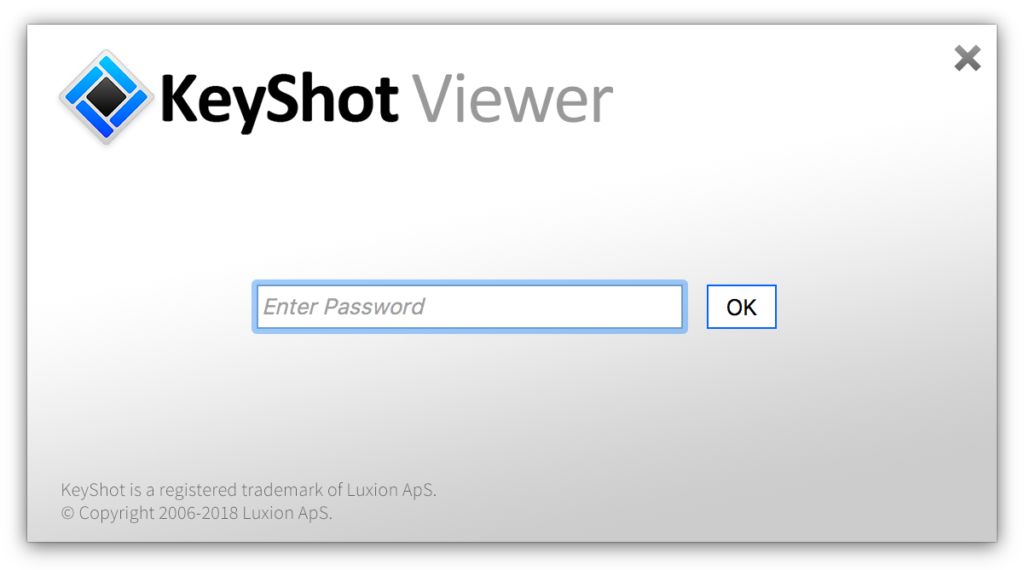
The camera state is defined in KeyShot Pro. You will need to contact the scene provider to get a version of the scene that is saved with the camera in an unlocked state. - What if I don’t know the password to open a scene?
You will need to contact the provider of the scene. - Why is the Real-time View not using the entire screen space?
In order to be efficient about CPU usage the Real-time View in KeyShot Viewer is limited to 1920×1080 resolution. If you wish to take advantage of the entire screen space on high-resolution displays you will need to use Presentation Mode in KeyShot Pro. - How do I know if I’m using the latest version of KeyShot Viewer?
If there is an update to KeyShot Viewer available a notification will appear on the splash screen. - Where are the demo scenes located on my computer?
Windows: C:\Users\Username\AppData\Local\Luxion\KeyShot Viewer 2023
Mac: Library/Application Support/KeyShot Viewer 2023 - Why does it say “Rendering Complete” at the top of the screen?
The real-time view will not render more than 256 samples so the CPU isn’t continuously used when KeyShot Viewer is left sitting. - Does KeyShot Viewer support Animation?
No, a file loaded with Animation included will show the scene at 0s and cannot playback any Animations.