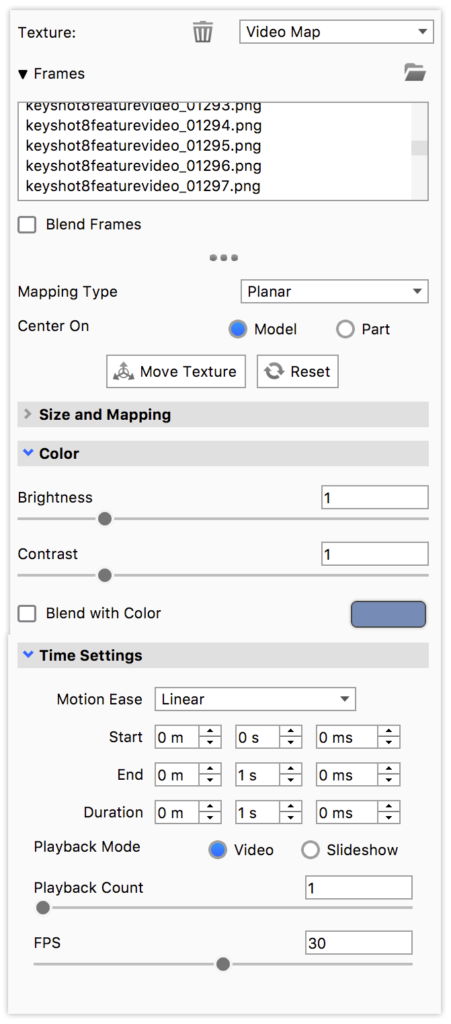
The Video Map texture is a pro feature. A Video Map texture is an type of Image Map. Video Map textures and their settings can be viewed in the Project Window > Materials > Textures tab.
With a Video Map textures, image sequences can be set as Textures (or Labels) to animate device displays and much more.

Adding a Video Map
From Project > Materials > Textures select Video Map from the Texture drop-down menu or Add Label (Video) from the Labels tab. Select an image sequence in the file browser or a video file to extract the frames. This will create a node in the Animation Timeline in which you can position and adjust the animation similar to other Animation types.
Frames
To add frames you can:
- add a sequence of images
- select a video and KeyShot Studio will extract the frames for you. Supported formats are: avi, mp4, mpeg, flv, webm, dv, f4v, mov, mlv, m4v, hevc, ogg, ogv. Some formats may have variants encoding which are not supported (for example, avi may include encodings which may not be directly supported.)
Blend Frames
When enabled the transition from one frame to another will be blended. This can be useful e.g. if the FPS of your video map is smaller than the overall animation in which case blending frames can prevent the video from flickering.
Size and mapping
See the Move Texture page
Color
Brightness
Ajdust the brightness of the frames.
Contrast
Adjust the contrast of the frames
Blend with Color
Blend all frames with the selected color
Time Settings
Motion Ease – This will let you add acceleration and deceleration to the video texture. This not something you would usually use for regular videos. But the Video map can also be used for e.g. changing displacement textures in which case motion ease is relevant.
Start, End, Duration
By default the video map will start at frame 0 and have a duration of 1 second. The Time Settings enable you to edit that. You can also drag the Video Map animation in the Animation timeline to alter timing/duration. Notice that changing these value will impact the FPS
Playback mode
Determines how frames are distributed on the timeline.
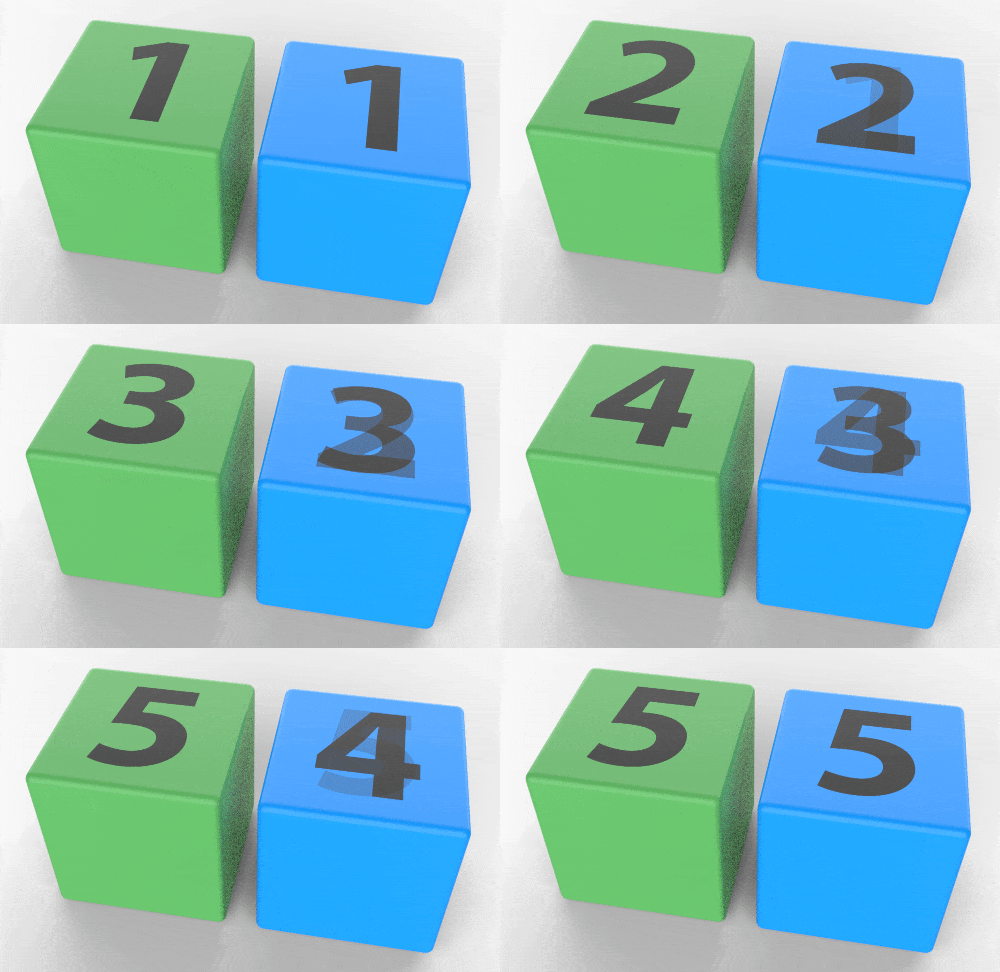
- Video – All frames are distributed equally on the timeline so they will be visible for the same amount of time.
- Slideshow – The last frame is moved to the very end of the timeline and the rest of the frames are distributed accordingly.
This is relevant e.g when operating with few FPS and blend frames are enabled as shown in the example below, where the green cube is in video playback mode and the blue is in slideshow mode. Notice that in video mode the 5th frame is visible relatively longer than the other frames.

Playback Count
Here you can set the number of times the video is played.
FPS (Frames Per Second)
This sets the frame rate – increasing the frame rate will give a smoother video while decreasing the frame rate will produce a more blurred or even flickrering result. Note that changing the FPS will impact the Duration and End time of the video texture.