By default, a worker is active when connected to the manager. The worker schedules inside KeyShot Network Monitor offer control of when each worker will be active or inactive. Network administrators can setup the Worker Schedules by logging into his/her account from any manager, worker, or client computer. Learn more about users.
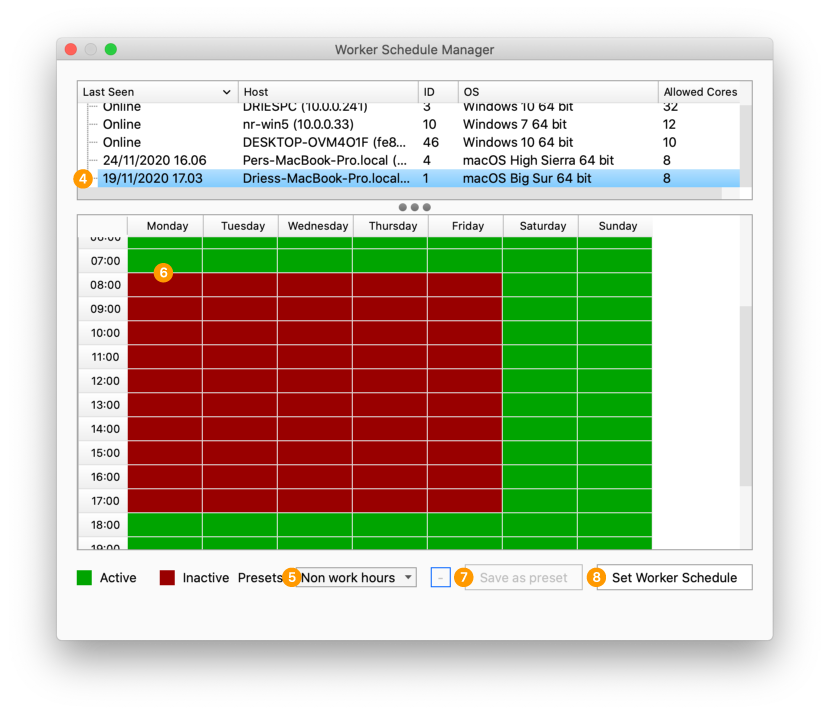
The Worker Schedules window shows a list of worker computers along with each individual worker’s weekly schedule. The schedule is made up of red and green blocks. Green means active, while red means inactive. An active worker will use its processing power for rendering while an inactive worker will not use any of its processing power for rendering.
How To Set A Worker’s Schedule
1. Log In
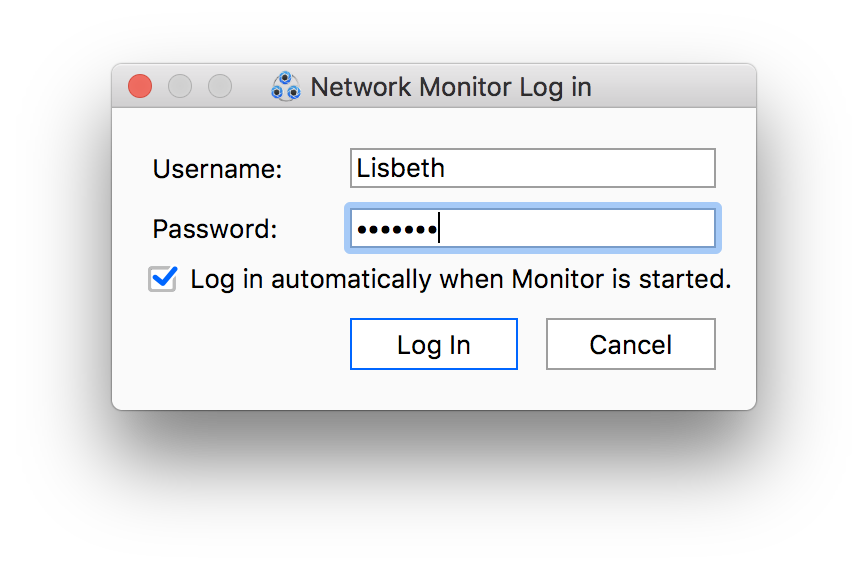
Inside KeyShot Network Monitor, click File > Log in and enter your administrator credentials.

2. Show Worker Status
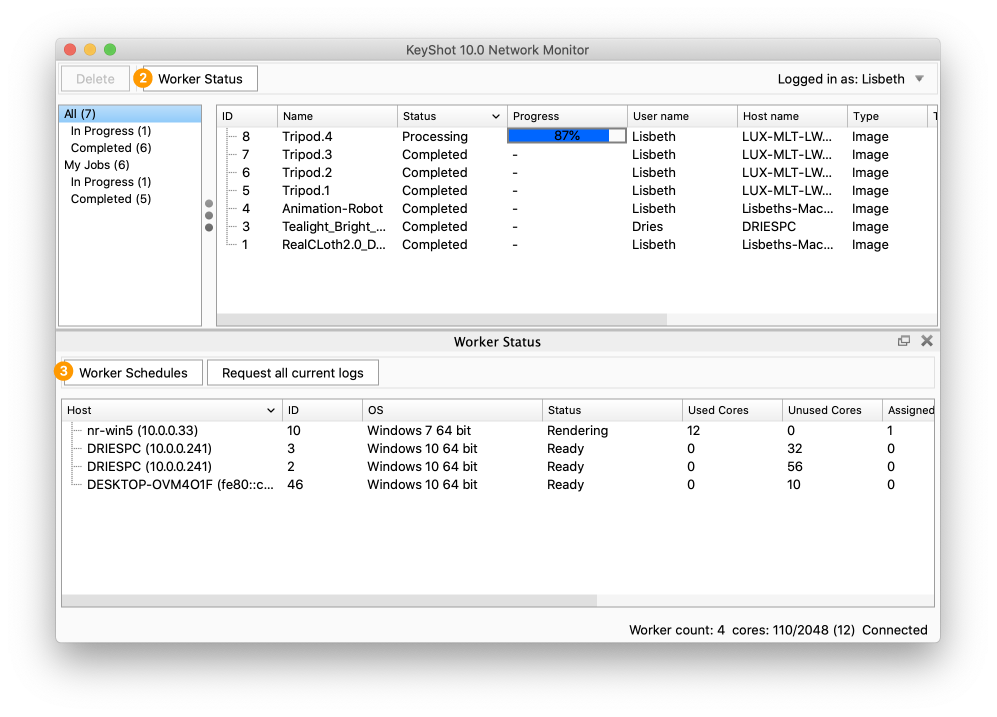
If the Worker Status panel is not visible Click Worker Status to display it.
3. Launch worker schedule manager
Inside the Worker Status panel, click Worker Schedules.

4. Select Worker
Select the worker you want to set up a schedule for in the top list. Now you can either choose to use a preset schedule or create your own.
5. Worker Schedule Presets
The worker schedule comes with two presets:
- Always Active
- Non Work Hours – This will make the worker inactive Monday to Friday, between 8am and 5pm (8:00-17:00).

6. Custom Schedules
You can also create your own schedule based on your rendering and processing needs. For example, you may want a worker to become active during lunch hour. Click the 1-hour blocks to toggle active/inactive. Red blocks indicate inactive hours and green blocks indicate that the worker is available.
7. Save your custom preset (optional)
Once you have set up your schedule, you can click Save as preset to save a custom preset.
Name your preset and click OK. You may now select this preset from the Presets drop-down (5).
8. Apply Schedule
Click Set Worker Schedule. Your worker schedule is now set!