The Panoramic Lens Setting (Pro feature) for Cameras allows you to render a Spherical or Cube Map image in real-time or rendered output. This feature can be used to render out your own spherical EXR images to use as environments to light KeyShot Studio scenes or to load in your VR headset image viewer.
Whenever a Panoramic lens is used, the camera position will be limited to spherical 360 degree viewing and the camera target is used as a position reference.
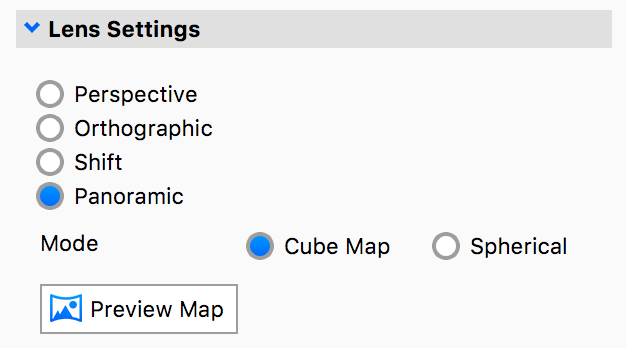
Using the Panoramic Camera
In the Camera tab, under Lens Settings, select Panoramic. Select your desired format of Spherical or Cube Map from the Mode radio buttons. The Real-time View will display a Panoramic Preview message at the top to indicate you are Panoramic mode. This means the camera can be rotated spherically and the real-time rendering in the Real-time View will not occur.
Cube Map mode
When using the Cube Map Mode the Resolution in the Image tab will be locked at a 6:1 ratio. Cube Maps are essentially 6 squares that make up a cube, and they are primarily used with VR Headsets.
Spherical Mode
When using the Spherical Mode the Resolution in the Image tab will be locked at a 2:1 ratio. Spherical maps are 1 image and they can be used to create EXR images.
Tip
If the map does not appear clear, try to increase the pixel count of the current Resolution in the Image tab
Preview Map
Click the Preview Map button to open a flat preview of your Panoramic image.
Reset Panoramic Camera
In the bottom of the Real-Time View there is a button which enables you to return the camera to the original view.
Moving a Panoramic Camera
Since the Camera Position is limited to spherical 360 degree viewing, there may be times where you want to adjust the camera position. There are two ways to move a Panoramic Camera.
- Position and Orientation
You can use the Position and Orientation sliders or input boxes in the Camera tab to adjust Distance, Azimuth, Inclination and Twist. Grab the slider to make fast adjustments or enter a value into the input box for more precision. - Geometry View (Pro only)
If you are using KeyShot Studio Pro, you can move the camera in the geometry view. You can open the Geometry View (Window > Geometry View…), select the Geometry View icon on the Ribbon or hit the O-key.
In the Geometry View, right-click the active camera and select Move Active Camera Position to adjust the camera. When you move the active camera, you will see it automatically adjust to keep the same camera target.