RealCloth
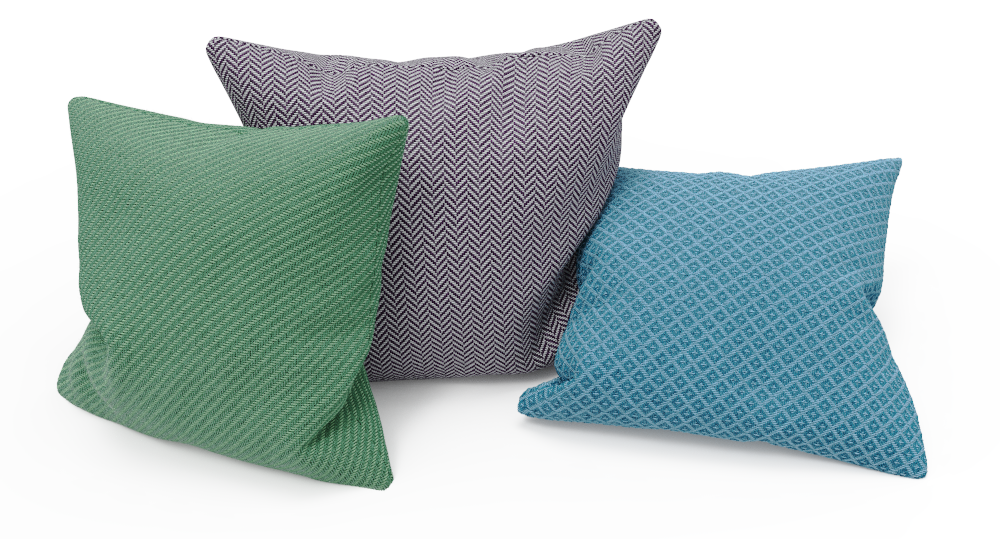
The RealClothTM procedural material enables you to create woven fabrics, with your custom weave patterns, detailed down to the ply. And make the cloth appear even more tactile with flyaway fibers.
The warp describes the long threads held under tension during weaving. The weft is the the thread that is passed through the warp threads across the width of the cloth.
Prerequisites and Limitations
• RealCloth material requires that your geometry has UV coordinates. If your part does not have good UV’s you can try the Unwrap UV tool.
•The RealCloth material does not support Labels.
• If used on Cutaway Caps, RealCloth cannot use flyaway fibers.
• Displacement and flyaway fibers on RealCloth are currently not supported in Render NURBS Mode.
Tip
For the best result, the UV coordinates should be “in proportion”, in the sense that 1 unit in the U direction matches 1 unit in the V direction. Consider the UV map as a cut pattern applied to the cloth – any warping in the UV coordinates will appear as stretched fabric.
|
|
Edit Weave Pattern (Pro)Click the Edit Weave Pattern button Pattern Size: This determines how many threads the pattern will span
Pattern Preview: Here you can edit the pattern. Each crossing between a warp and weft makes up a cell in the grid, click a cell to switch which of the threads are in front. Invert Weave Pattern: This will switch all thread crossings around. |
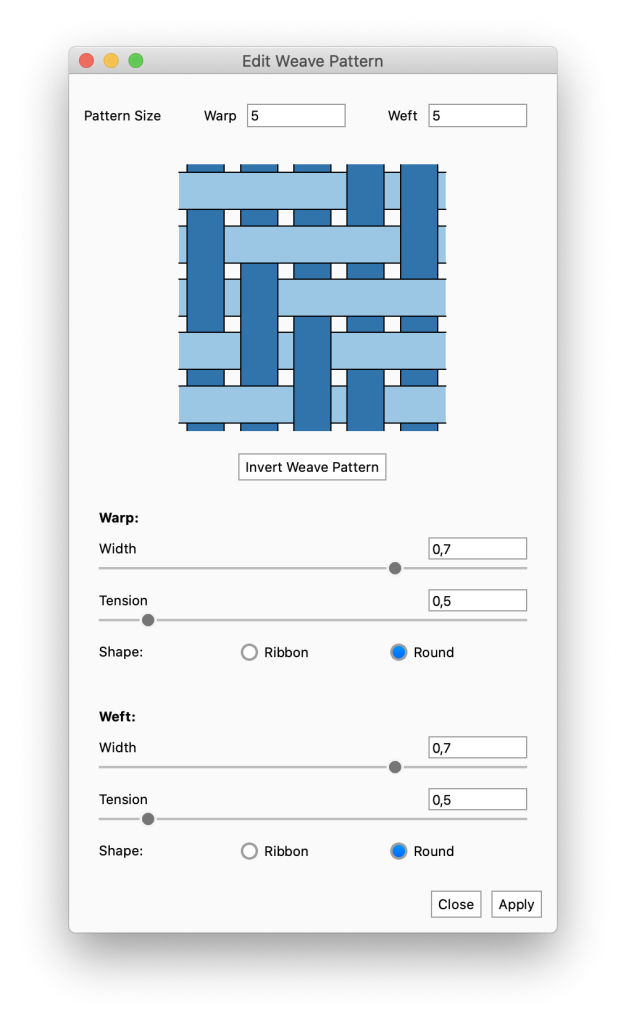
Warp
- Width: This determines the width of the warp threads. The scale goes from 0-1, where 1 means that the threads are as wide as the cells.
- Tension: Here you set how tightly the warp threads are strung.
- Shape:
- Ribbon: The ribbon-shaped thread is highly compressed and flat. Note that if you are using the ribbon shape, Ply Count and Ply Pitch will not be relevant.
- Round: The round thread is not highly compressed.
Weft
- Width: This determines the width of the weft threads. The scale goes from 0-1, where 1 means that the threads are as wide as the cells.
- Tension: Here you set how tightly the weft thread is strung while woven through the warp.
- Shape:
- Ribbon: The ribbon shaped thread is highly compressed and flat. Note that if you are using the ribbon shape, Ply Count and Ply Pitch will not be relevant.
- Round: The round thread is not highly compressed.
Close/Apply: The changes to the weave pattern won’t be applied instantly. Because calculating the weave pattern may take a some time you have to press apply Apply to see the effect on the cloth in the Real-time View. When you are happy with what you see in the Real-time View you hit Close to hide the dialog.
|
|
AppearanceSize: this lets you select how you want to control the size of the weave pattern.
|
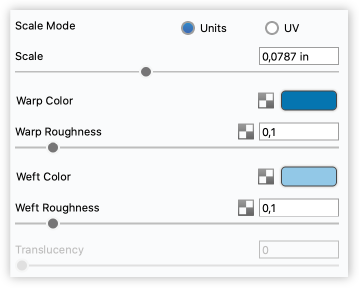
Color: This controls the overall color of the material. When light enters the surface, it will take on the color set here. The amount of color that you see in this material is highly dependent on the transparency setting as well.
Roughness: This will add microscopic levels of imperfections to the surface of the material when the values are increased. When set to 0 a material will appear perfectly smooth and polished. When the value is increased, the material will appear rougher as light is diffused across the surface.
Translucency: Increasing translucency will make the curves appear more see-through. Setting this to 0, will make the curves appear perfectly opaque.
This setting is only available if you have 3D Ply Geometry applied under Geometry settings.
|
|
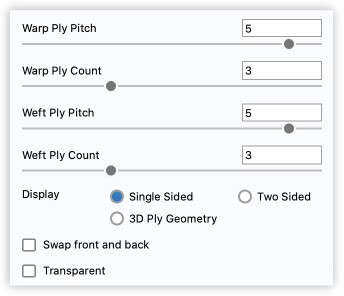
GeometryPly Pitch: Pitch is the metric approach to measuring “thread count”. The value determines the distance along the yarn for a single revolution of a ply (measured along the length of the thread, not the length of the twisted strand) Ply Count: Ply is the number of strands that are twisted around one another to create a single thread Display: There are three settings here, to control how accurate the cloth representation should be.
|
Known Limitations
Applying 3D Ply to a geometry with overlapping UVs, will appear to break your geometry. Try using the Unwrap UV tool to avoid this.
Swap front and back: This will change the direction that the front and back of the material is facing. Use this if the flyaway fibers are facing the wrong way.
Transparent Weave: Enable this if you want the gabs between threads to be transparent. Notice that this is not the same as adding translucent qualities to the woven parts.
|
|
Flyaway FibersAdd flyaway fibers: When enabled, this will add stray fibers on the cloth surface. The fibers are based on displacement, so they won’t be visible until the the displacement has been executed. Flyaway fibers will follow the direction of the normals. Flyaway Density: Determines the number of flyaway fibers. The density is calculated in relation to the weave pattern. With a density of 1, you will on average get 1 flyaway fiber per yarn crossing. Flyaway Radius: Determines how thick the fibers are. Flyaway Length: Determines how long each fiber is. Flyaway Length Variation: Adds variation to the length of the fibers. The fibers will be varied up to the selected length + length * variation value. Flyaway Randomness: by default the flyaway fibers are straight, Adding randomness will warp the fibers. |
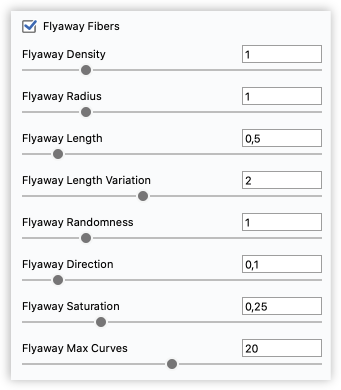
Flyaway Direction: Determines the angle at which the flyaway fiber comes out of the plies in the yarn. At 0 the fibers will have a 90* angle to the ply, and at 0 the fiber will follow the direction of the ply.
Flyaway Max Curves: Adding large amounts of curves can make the scene very heavy. The amount of curves is impacted by both the density and length variation values. Flyaway Max Curves enable you to limit the overall amount of flyaway curves added pr. part. When the limit is reached, the density of flyaway fibers will be impacted. The limit value is measured in millions and is only approximate. If you don’t want to set a limit just leave the value at 0.
|
|
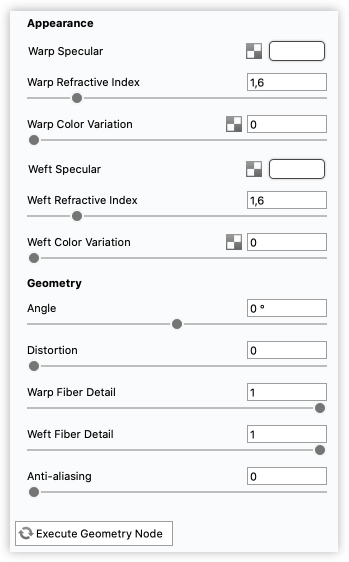
AdvancedIn this section you will find more advanced settings related to the above settings categories. AppearanceSpecular: This is the color and intensity of the reflection of light sources within the scene. Black will completely turn off reflections, while white will provide a very shiny plastic look. To achieve the most realistic look use some level of gray or white. However, adding color can give the material a metallic effect. Refractive Index: This controls how much light will bend or “refract” as it passes through parts that have this type of material. The default of 1.5 is accurate for simulating most types of plastics, but you can increase the value to create more dramatic refraction within the surface. Color Variation: Will add variation of the color of the thread within the weave, running along the pattern. When set to 0 the threads will be perfectly uniform in color. Increasing the value will add subtle variations that can help emphasize the pattern and give a more “handcrafted look”. |
Geometry
Angle: This enables you to change the direction of the weave.
Fiber Detail: This controls how pronounced the fibers appear in the threads. 0 is not at all and increasing the value adds detail.
Anti aliasing: Reduce moire artifacts by adding noise to the image. This may require more samples when rendering.
Execute Geometry Node: After any edits to either Flyaway Fibers or 3D Ply Geometry, you must “execute geometry” before you can see the effect in the Real-time View.
Note
Whenever a scene contains un-executed changes to a displacement parameter (eg. flyaways or 3D ply geometry) , you will see the ![]() Execute Displaced Geometry button in the top right corner of the Real-time View. Press this to execute the geometry changes.
Execute Displaced Geometry button in the top right corner of the Real-time View. Press this to execute the geometry changes.