Studios
Studios (Pro feature) allow you to combine and save scene/model/material variations in one file for quick creation and presentation. Studios may contain any combination of Camera > Environment > Image Styles > Models Sets or Multi-Materials.
The Studios Window
The Studios window is a dockable window – launch it via:
- Main menu under Window > Studios…
- The Studios icon
 in the Ribbon
 - Hotkey: U
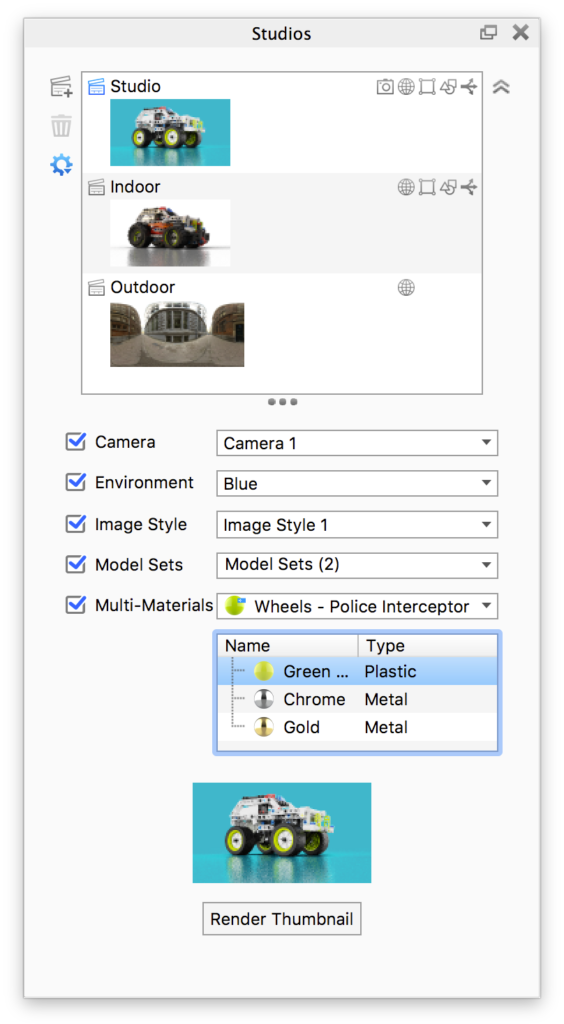
In the top of the Studios window is a list of all the Studios in the scene. The active studio will be highlighted with a blue background.
Inline with the Studio name are icons ![]()
![]()
![]()
![]()
![]() that indicate what elements are included in that Studio.
that indicate what elements are included in that Studio.
You can reorder the studios list by drag and drop.
Next to the Studios list you find the options to ![]() Add new Studio,
Add new Studio, ![]() Delete Studio and
Delete Studio and ![]() Thumbnail settings.
Thumbnail settings.
Under the Studios list you find five drop-down menus that display the currently active Camera > Environment > Image Style > Model Sets and Multi-Materials.
Setting up a Studio
|
Click the Add Studio icon To modify a Studio simply select a different Camera, Environment, Model Set or Multi-Material from the drop-down menus.
|
Note
When you are using Studios with the Configurator, any Model Sets/Multi-Materials that are selectable in the configuration will not be considered to be tied to a studio. This means that only Model Sets containing “props” will swich with the Studio. This also applies to multi-materials where only materials of props can change with a studio.
Thumbnails
When a Studio is created a thumbnail is automatically generated. If the Camera is set to Free Camera the thumbnail will show the environment. You can generate thumbnails for each Studio by clicking the Render Thumbnail button in the bottom of the window. This will create a thumbnail using the active elements of the Real-Time view
 Thumbnail Settings
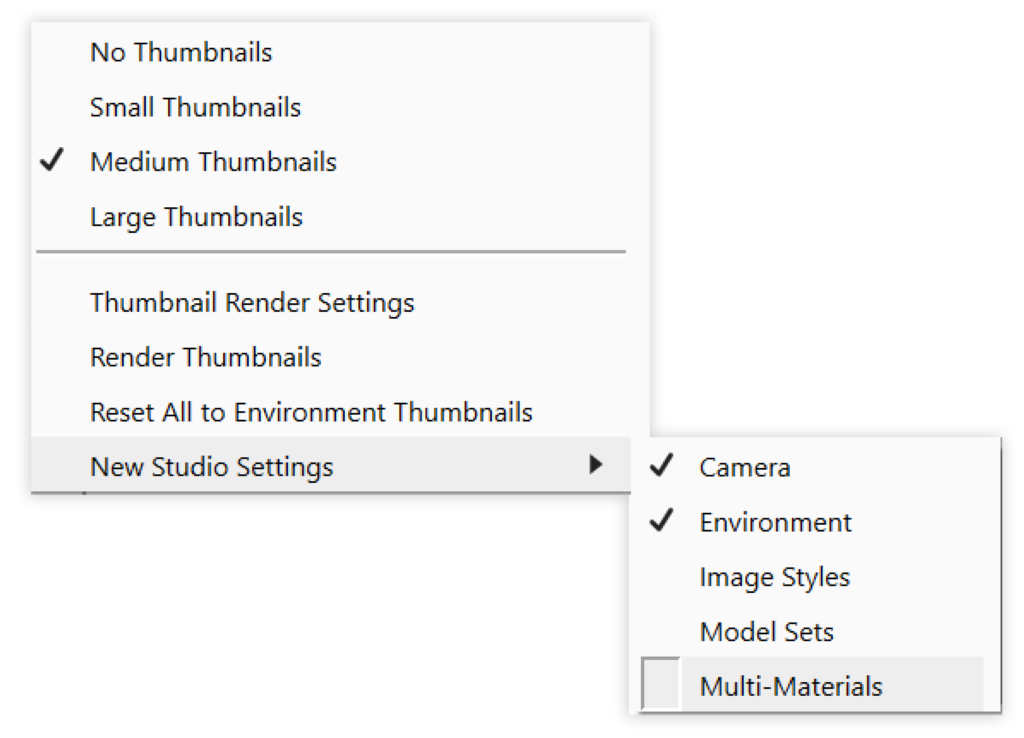
- Preview size: Set the size of the thumbnails in the list, or choose not to show thumbnails in the list.
- Thumbnail Render Settings:
- Samples – set the number of samples you want to use for rendering each thumbnail.
- Use environment thumbnail for Studios without thumbnails – if a studio does not have a camera included the thumbnail can either be rendered from the free camera or the thumbnail can show the environment thumbnail.
- Render High Res – if you need the thumbnails in better resolution – eg. for use with the Configurator
- Render Thumbnails – This will Render all thumbnails. If you only want to render a thumbnail for a specific studio, select the studio and press the button below the preview
- Reset all to Environment Thumbnails – this will discard all current thumbnails and replace them with the Environment thumbnails – if no environment is included in the studio, the current environment will be used.
New Studio Settings
When adding a new Studio, the default is set to only include the Camera and Environment each time. However, under the New Studio Settings flyout, you can define which components (Camera, Environment, Image Style, Model Sets, Multi-Materials) are used each time you create a new Studio.
Studio Switch Events
If you work with animations you can switch out entire studios as a part of the animation using Studio Switch Events. These are added by right-clicking a studio in the studios list. Learn more about animation with studios.