The Perspective lens closely represents how a physical camera lens works.
Tip
When trying to match perspective in an backplate image, it is recommended to set the Perspective value to the camera lens focal length which is often included in the Exif data.
Match Perspective
Perspective Matching allows you to interactively match the Perspective camera to the camera with which a background image was taken. In order to activate Match Perspective, please load a Backplate. See Environment Settings for further information on this topic.
When clicking on the Match Perspective button, A widget appears in the Real-Time View and you will also notice 2 or 3 sets of vanishing lines in different colors – The lines and colors correspond to the scene’s coordinate system. X is blue, Z is red, and Y is green.

Note
The Match Perspective has been added to the Tools section in the Ribbon
Two-Point Perspective
This is the mode used in most cases.
Adjust the vanishing lines according to the plane on which the object is placed.
Three-Point Perspective
Three point perspective is most commonly used when trying to place building or object when the camera is placed at a low or high eye level.
Adjust the perspective with 3 sets of orthogonal lines to match the vanishing points to the plane on which the object is placed and of vertical lines. Make sure the up axis of the matched perspective is the same as the one in the scene.
Lock Rotation
When the rotation is locked any adjustments to the 3 sets of lines will not affect the azimuth.
Ground Grid
Turn on ground grid in the scene to help match the perspective. the grid will not be visible in rendered output.
Reset lines
Reset all sets of lines to their default position. The camera will update accordingly.
For best results we recommend to turn on Show Coordinate Legend, found under the View menu. It can also be toggled on and off using the Z hotkey. This will help you identify the orientation of the model in the scene.
Tip
For the best results try to find orthogonal lines in the backplate image that you can use as guides when matching the perspective. Move the end points of the lines according to the coordinate layout to reference points in the background image. Notice the camera values update accordingly. Once aligned, pan and dolly the camera to position the object so it fits properly inside the scene.
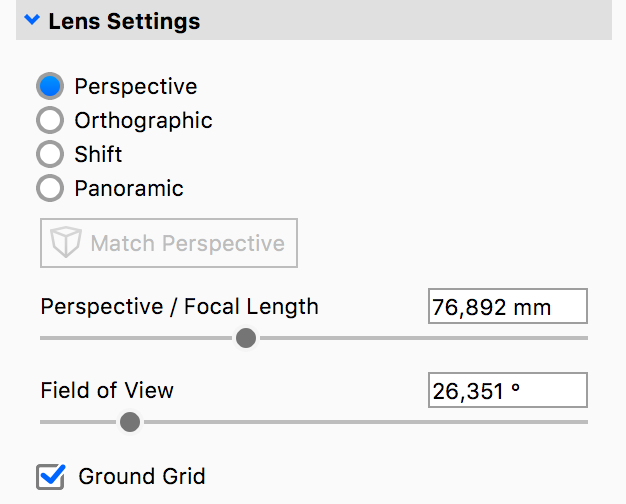
Perspective / Focal Length
The Perspective / Focal Length controls the amount of distortion (convergence) seen in the Real-time View; real world values can be used here to replicate camera lens focal lengths.
Field of View
Field of View (FOV) is inversely related to Perspective and controls the “cone of vision” seen in the Real-time View. Larger Perspective values will result in a smaller Field of View, while smaller Perspective values increase the amount that’s visible in the Real-time View.
Ground Grid
Ground Grid will overlay a 1:1 grid on the KeyShot Studio ground plane; the density of the grid is controlled by the Environment size. This grid is useful for matching perspective and camera angles and will not be visible in rendered output.
Popular focal lengths
(Source: Wikipedia)
- 14 to 21mm: Ultra-Wide — Dramatic distortion due to very short focal length.
- 24 to 35mm: Wide — Wider field of view than a standard lens. The resulting perspective can show some distortion.
- 50 mm: Standard — Some distortion but generally acceptable for most use.
- 85 mm: Portrait — Less distortion than standard lenses.
- 135 mm: Telephoto — Commonly used to capture faraway objects.
- 200 to 500 mm: Super Telephoto — Specialized lenses for minimal distortion.