To export your files go to File>Export and select a format. For export to GLB/glTF, USD, AR or Web Viewer select Export Mode or click the Export Mode icon in your Toolbar.
The export formats available in KeyShot Studio Pro, include the following:
| Format | Materials | Textures | Normals | UVs | Cameras | Animation |
|---|---|---|---|---|---|---|
| OBJ | Color | No | Yes | Yes | No | No |
| STL | Vertex Colors | Vertex Colors | Yes | No | No | No |
| FBX | Color | Yes | Yes | Yes | Yes | No |
| glTF/GLB | Baked | Baked | Yes | Yes | Optional | No |
| USD | Baked | Baked | Yes | Yes | No | No |
| 3MF | Baked | Baked | No | Yes | No | No |
OBJ
Object files. A simple data-format that represents 3D geometry alone. Widely supported in 3D graphics applications.
The OBJ format stores information about the scene’s geometry and colors, but not about the textures, environment etc.
Export to OBJ
Simply select File > Export > OBJ, select a location and give the file a name.
KeyShot Studio will output 2 files:
- An OBJ containing all the geometry data
- A MTL file containing information about the diffuse color of the objects.
GLB/glTF
GL transmission format. “The jpeg of 3D”. Designed to bridge the gab between 3D content creation tools and modern 3D applications. It can also be used with AR viewers mainly on Windows and Android.
The glTF format will bake materials and textures in a single texture file.
Learn how to export to GLB/glTF.
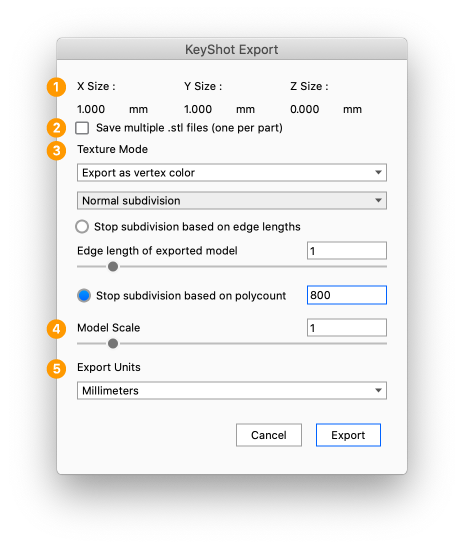
STL
STereoLithography files. A common 3D format mostly used for 3D printing.
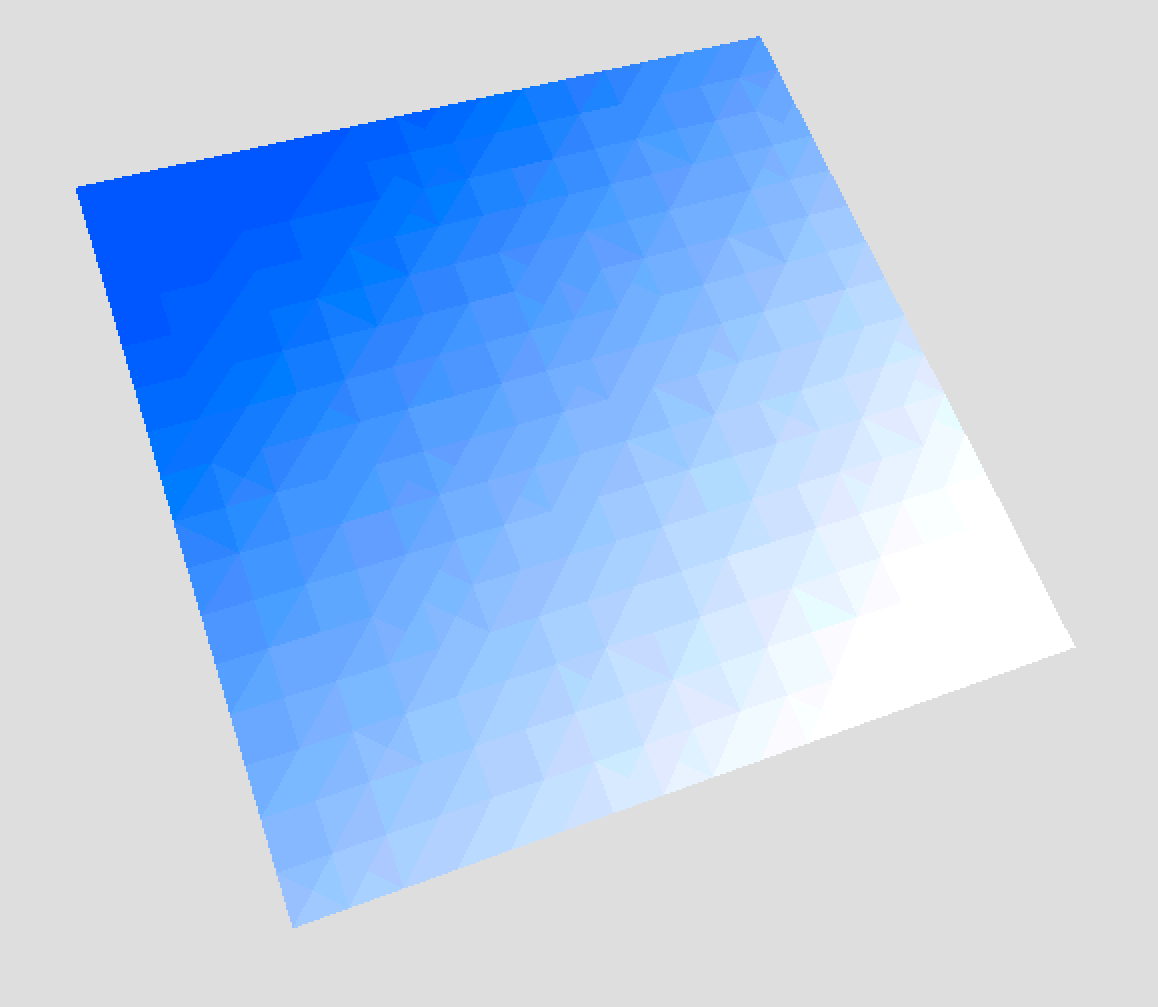
The STL format is primarily for exporting the geometry, but you can also select to translate materials and textures (only color) to vertex colors.
Export to STL
Select File > Export > STL select a location and give the exported file a name.
- Information about the size of the exported geometry. This will be updated if you change the Model Scale or the Export Units.
- Save multiple .stl files Enable this if you want KeyShot Studio to export each part to a separate STL file. A folder will be created for all the exported files.
- Texture Mode Select how to translate materials and textures.
- Export as single color will give the same color to all parts in the scene.
- Export as vertex colors will determine the color of each face (triangle in the mesh). When this is selected you have to select the method and level of detail.
- No subdivision will set the color for each existing face in your mesh.
- Normal Subdivision will subdivide the the surface in evenly distributed faces. You can select if you want to limit the number of faces based on Edge length or on Polycount.
- Adaptive Subdivision will subdivide the surface while taking the texture into account. Similar to with the normal subdivision you have to limit the number of faces either via the Edge length or Polycount.
- Model Scale enables you to scale the geometry.
- Export units lets you change the units for the STL file, note that size of the model is not converted, so changing the units from millimeters to centimeters will effectively make your mode 10 times the original size.

FBX
Filmbox files. Widely supported 3D format owned by Autodesk.
Exporting to FBX will output a file containing any color/diffuse textures used in the scene. Meanwhile the FBX exporter will always convert the texture mapping to UV maps, using the default position, so any settings or transformations of the texture (scale/move/rotate) may be discarded.
The exported FBX also includes cameras.
Export to FBX
Simply select File > Export >FBX, select a location and name for the export and you are done.
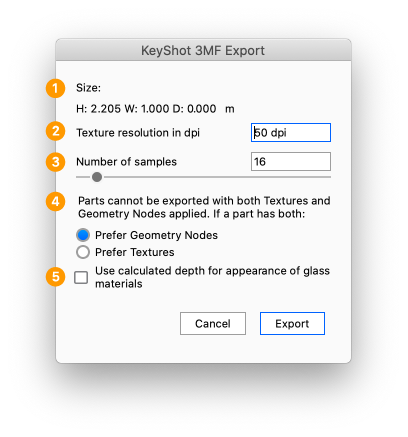
3MF
The 3D Manufacturing Format (3MF) is developed by the 3MF Consortium and used for 3D printing. 3MF format allows designers to send full-fidelity 3D textured model and color information to supported apps, services, and printers. See Table 1 above for the supported output features.
Export to 3MF
Select File > Export > 3MF, select a location and give the file a name.
- Size: If your scene does not have scene units defined, you will need to select the scale of your geometry
- Texture resolution in dpi: The texture resolution in dpi for each part. The dialog will start with a suggested value that is based on the scale of your model. A higher dpi will yield a sharper/more precise texture but also impacts the file size.
- Number of samples: This controls how many times each pixel in baked texture is calculated for increased accuracy. Too low of a value will result in an image that has excessive noise. Increasing the value will increase the export process time.
- Prefer Geometry Nodes or Textures: the format cannot handle both Geometry nodes (bubbles, flakes, displacement) and textures on a single part. If a part has both this choice will let you prioritize one type.
- Use calculated depth for appearance of glass materials The appearance of glass materials (dielectric materials) with color, depends on the thickness of the of the material.
Some advanced 3D printers has a setting that enables print with colored cores, but in some instances it is preferable to use a texture on top of a standard resin core – eg. if you have a label on top of a dielectric material.
When this setting is enabled, the exporter will take the thickness of the parts into consideration when baking the texture. Note that when enabled, this will increase export process time remarkably.
USD
USD – Universal Scene Description. Developed by Pixar. 3D file format that comes in following variants: USD, USDa, USDc, and USDz. It is used for transferring 3D scene information between 3D tools and also for showing 3D content, eg. AR, mainly on MacOS and iOS.
The USD, UDSa and UDSc formats will export a file along with a folder containing all relevant textures.
USDz is a zip-compressed USD file that also contains relevant textures.
Learn how to export to USD.
AR (.usdz, .glb)
This export option will output both a .usdz version and a .glb version of the scene. This is useful for some AR viewers, where both formats are required.
Learn how to export to AR.