What does the tool do?
The physics simulation tool enables you to do physics simulation in your scene, and record it as Keyframe animations.
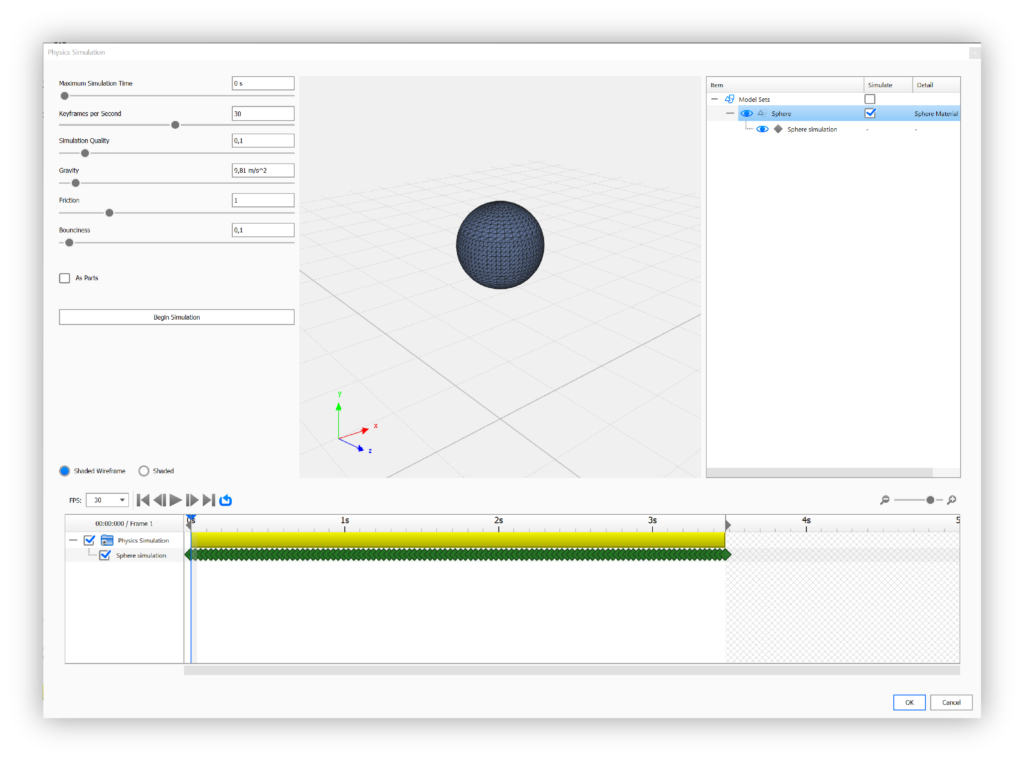
How to use Physics Simulation
- Launch the Physics Simulation tool
The Physics Simulation tool can be launched either from the Tools Section in the Ribbon, or via right-click on a model or part in the scene tree or Real-time view. - Select a part or model
In the scene tree list to the right, select which parts or models should be included in the simulation. - Simulation Time
This allows you to determine how long the simulation is going to last. Note that if your simulation time is 0 the animation will run until everything is settled. - Keyframes per Second
You can adjust how many Keyframes per second your Keyframe animation should contain. - Simulation Quality
This allows you to control how many steps per second are calculated. By increasing this your simulation becomes more accurate, but it will also take longer to calculate. - Adjust the Gravity
You can set your gravity to a value between 0 and 100. - Friction
Allows you to globally control the static and dynamic friction on all objects. - Bounciness
Allows you to globally control how bouncy objects are, when colliding with other objects or the ground. - As Parts
As Parts allows you settle the parts of your model individually. - Begin Simulation/Stop Simulation
If you have made all the adjustments above, you can click Begin Simulation. You can also stop the simulation clicking the same button. - Animation Timeline
In the simplified animation timeline you can see and re-run the created Keyframe animations. - OK or Cancel
To finalize the changes to the scene and close the dialog, click OK. Cancel will revert all changes and exit the dialog.
Known Limitations
- Physics Simulation only works with mesh objects, and not with NURBS-only or Curve objects.
- Physics Simulation does not take other animations into account.
Note
When colliding an object with a surface object e.g. a ground plane, make sure the surface normals of your ground plane are pointing in the direction of the colliding object. Pointing the normals in the opposite direction will result in your colliding object to drop through your ground plane.
You can adjust your surface normals by using the Flip Normals tool.