The Render Options window contains all settings for Render Mode, CPU Usage, and Render Quality. These options are specific for the Still Image, Animation and KeyShotXR output.
Mode

Default
The Default render mode simply allows you to render immediately after adjusting your render output settings or, if using KeyShot Studio Pro, to send your render to the render queue.
Background (PRO)
The Background render mode option allows you to run the render in the background and continue working. Note that the Real-time View will be paused by default when the render is started. Select Render and deselect Pause Real-time Render to un-pause the Real-time View and continue working.
Send to Network
The Send to Network render mode allows you to send your render job to the KeyShot Network Rendering Monitor. Make sure the Monitor is installed and running to send a job to be rendered on the network. Visit the KeyShot Network Rendering Manual for more information.
CPU/GPU usage
Depending on Render Engine selection you can control CPU/GPU usage, which enables you to limit how many cores of your CPU/which GPUs are allocated for the render job.
Note
- If a user, without a GPU that meets requirements, adds jobs to the Queue in GPU mode, these cannot be rendered locally and will be skipped when processing the Queue. If you hover a job in the Queue you can see the details of the job, including whether it is a CPU/GPU job.
- When a GPU job is submitted to Network Rendering and there are only CPU Workers connected to the Manager, you will get a message informing you that the job will wait until GPU Workers are available. In the Monitor Queue you can always see the render engine intended for each job in the Mode column. Just as you can see the engine available from each worker in the Mode column in the Worker Status overview
Quality

KeyShot Studio has three output options for quality based on your needs.
Maximum Samples
The Maximum Samples option controls how many times the image or animation frame will be calculated and refined. Each additional sample will further smooth out noise/grain in the image. This option uses the same rendering technique as you see when working in the Real-time View. (This technique is also used in Maximum Time option, but differs from the method used in Custom Control option.)
Samples
This controls how many times each pixel in the rendered image is calculated for increased accuracy. Too low of a value will result in an image that has excessive noise. Increasing samples will reduce the noise, however, increasing this setting too high will increase render times without a noticeable difference in quality.


How many samples should I use?
Generally speaking, a simple scene will require fewer samples and a scene with more complex lighting and materials will require more samples. Start low and increase the samples if you still see noise or the render looks grainy. Before rendering out an animation using Maximum Samples, test your samples with a still image render first.
You can also set a Render Region on the Real-time View, focusing on the area, you think will require the most samples to look satisfactory. Turn on the Heads-Up Display (H hotkey) and let the Real-time View sit until the region looks that way you like it. Make a note of the number of samples from the HUD and use that info when setting the Max Samples.
Samples Per Frame
The Maximum Samples option will read Samples Per Frame when the Animation tab is selected under the Output section. This option is ideal for animation output as it guarantees that each frame will be rendered at the same quality. Therefore, as the animation plays through the frames you will not see changes/flickering in shadows or noise patterns on materials.
This method is typically preferred over the time-based output for animations, as some frames may require substantially more time to reach the same quality level as levels of detail and complexity change through the course of your animation. Using the time-based output will lead to more noise in the more complicated frames.
Samples and Resolution
A sample calculates the color of a pixel. There is a point of diminishing returns where you increase samples past the point of added quality, and just increase the render time.
Something important to be aware of is that as you increase the resolution of your image or animation, each pixel covers relatively less area of the image. This means you can use a lower samples setting when rendering at higher resolutions. Note that this does not apply to rendering with area lights, caustics or interior mode as increasing samples while using those features will still increase the quality.
Pixel Filter Size
This sets the amount of blur in pixels applied to the image to reduce the overly sharp look that computer-generated images can have. Increasing the value introduces more blur, but helps prevent aliasing and reduces sharpness. This does not increase render time. It is advised to leave this setting at the default value of 1.5. Higher values will cause low resolution images to look overly blurry, but can be used for high resolution renderings. A value of 1 disables pixel blurring. The maximum amount of blurring is 3 pixels.
Maximum Time
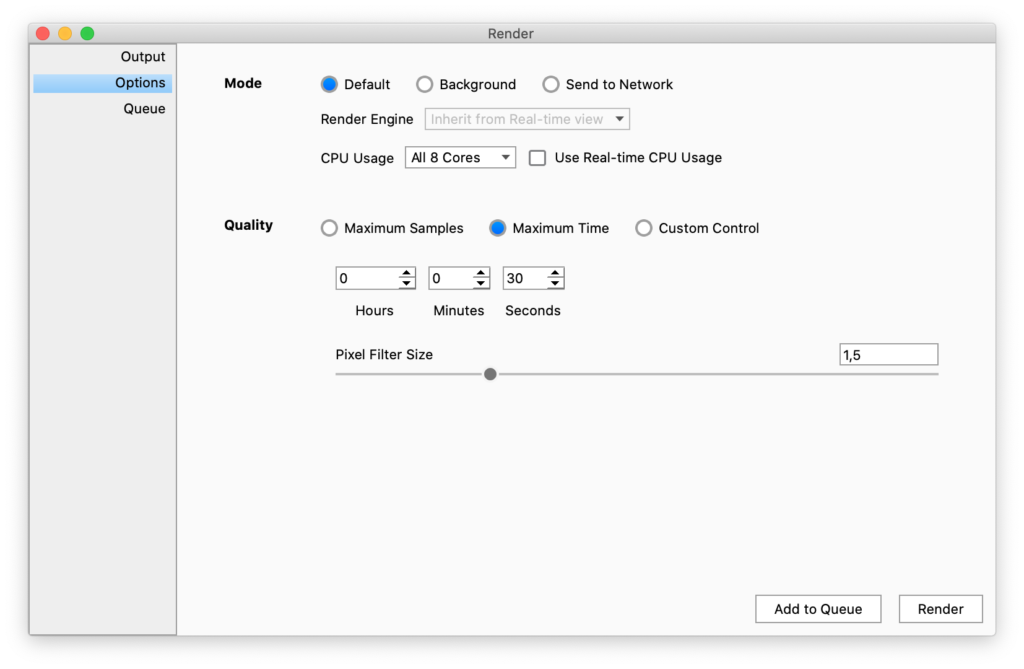
The Maximum Time option for render quality will progressively refine the render for the amount of time set. This option uses the same rendering technique as what you see in the Real-time View. This technique is also used in Maximum Samples option, but differs from the method used in Custom Control option.
When rendering an animation, you may set the maximum time for each frame to render, or set a total duration for the entire animation.
Custom Control
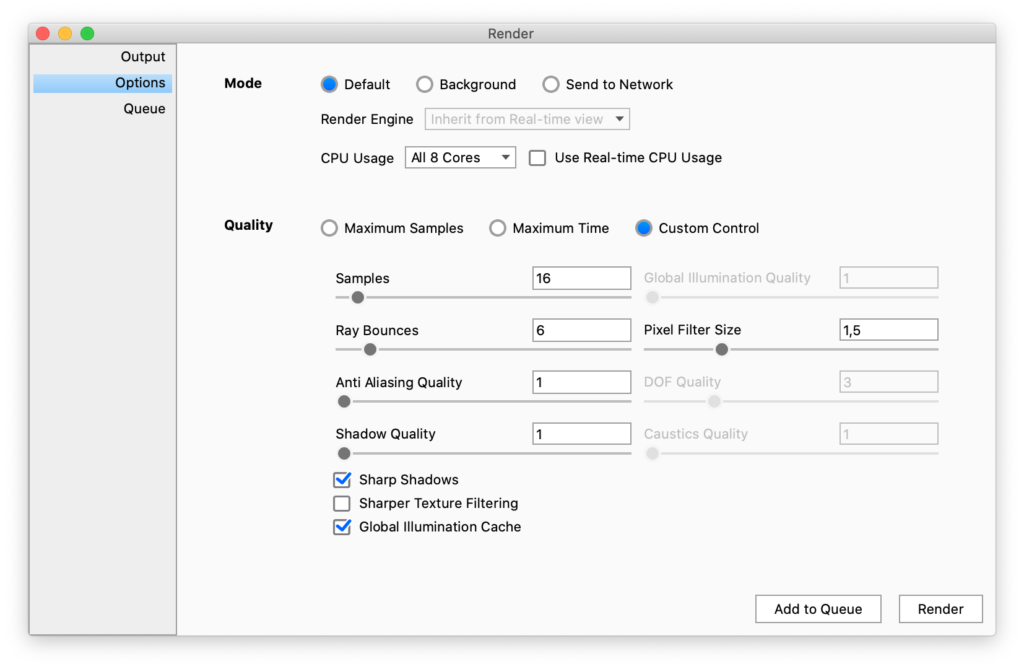
The Custom Control option allows control over all quality settings available in KeyShot Studio. This mode typically produces smoother results in areas of high noise or shadow.
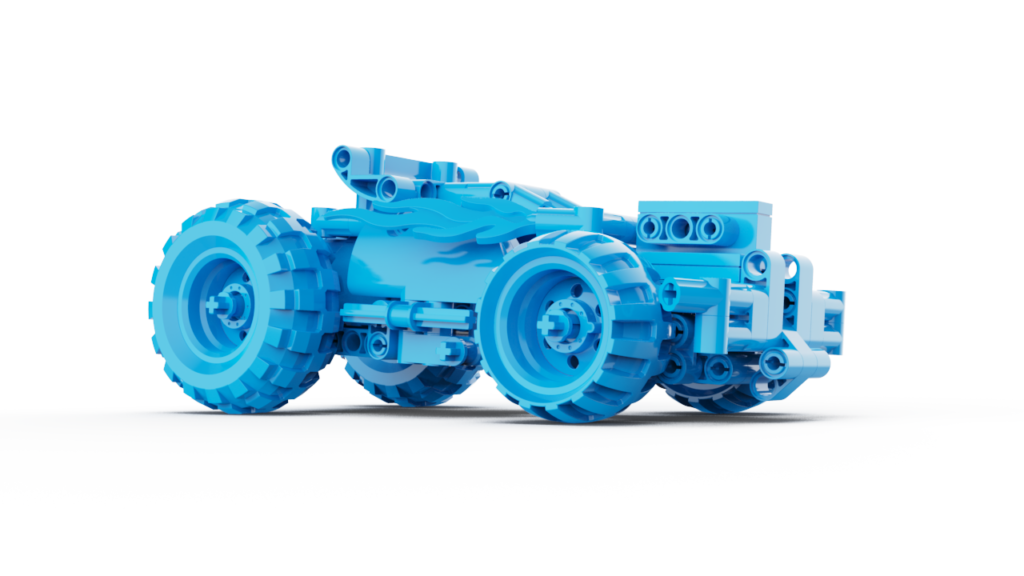
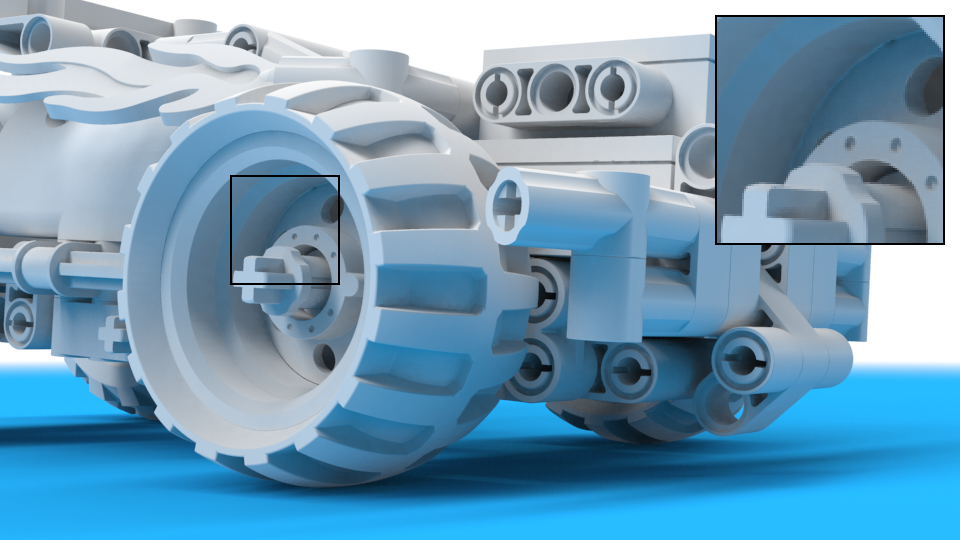
The example below shows a Custom Control rendering with a blue plastic material. Custom Control can be a good option for efficiently rendering noise-free images of scenes with diffuse materials like plastics.
Samples
This will control the amount of rays per pixel that will be sent into the environment to gather information to determine that pixel’s final shade. It is best to control this setting per material and set a value between 8 and 16 in the render settings.
For information on samples and setting samples per material, please see the section on roughness and glossy samples.
Ray Bounces
Ray bounces are the number of times rays of light are calculated as they bounce around a scene. Ray bounces are initially set in the Lighting tab and any values entered there will be inherited by the Render Dialog. The value set in the Render Dialog is not however inherited by the lighting tab. this way you can adjust the amount of ray bounces for the specific rendering without affecting the general setting.
Learn more about Ray Bounces on the Custom Lighting Presets page.
Anti Aliasing Quality
Anti aliasing is a method for smoothing out jagged edges that are created by pixels. Since pixels are made up of squares, they can produce a jagged look where edges meet. Anti aliasing smooths out these edges. In most cases, the default value of 1 is sufficient.
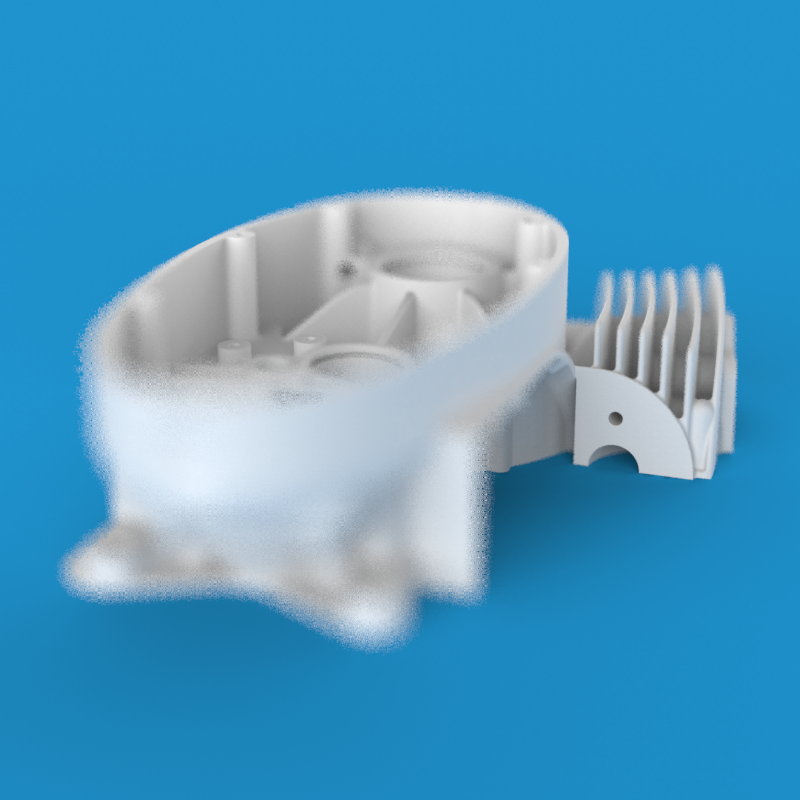
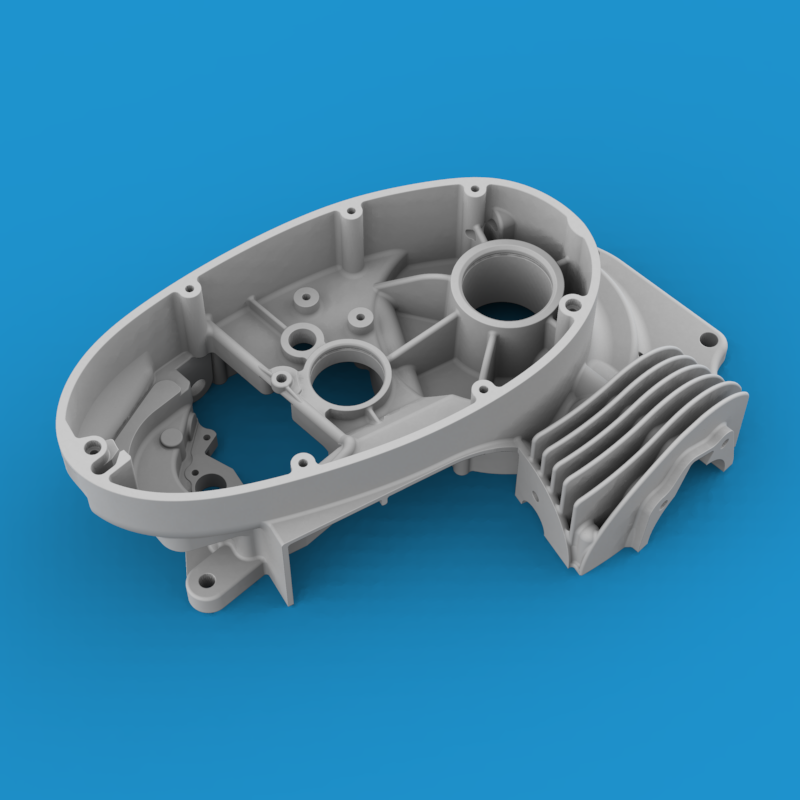
Increasing the anti aliasing quality can help to avoid artifacts that may occur when rendering with alpha (transparency) with objects having a very similar color to the background. For illustration, a synthetic example will be used.


When the Anti Aliasing value is 1 the blue side of the sphere shows artifacts. These artifacts are absent when an Anti Aliasing quality of 5 is used.
Shadow Quality
Shadow quality will control the shadow quality for ground and object shadows. Note that increasing Shadow Quality dramatically increases render time. This setting will have most effect for bright diffuse materials, like for example white plastics.

Global Illumination Quality
This will control the quality of all indirect light. Increasing this value can dramatically increase render time. It is rarely necessary to set a value above the default value of 1. If Global Illumination is turned off, this parameter will be grayed out. Global Illumination is enabled/disabled in the Lighting tap of the Project panel.


Pixel Filter Size
This sets the amount of blur in pixels applied to the image to reduce the overly sharp look that computer-generated images can have. Increasing the value introduces more blur, but helps prevent aliasing and reduces sharpness. This does not increase render time. It is advised to leave this setting at the default value of 1.5. Higher values will cause low resolution images to look overly blurry, but can be used for high resolution renderings. A value of 1 disables pixel blurring. The maximum amount of blurring is 3 pixels.
(No pixel blurring)
DOF Quality (Depth of Field)
This will control the quality of depth of field if it is enabled in the camera tab. Increasing this value will have an effect on render time. For production quality a value between 3 – 5 is recommended. If Depth of Field is not activated, this parameter will be grayed out. Please see the section on cameras for more information on depth of field.

Caustics Quality
Increasing this value will improve the samples and quality of the caustics. If caustics are not enabled, this parameter will be grayed out. You can enable caustics in the Lighting tab of the Project Panel. The maximum value that can be entered is 50. Increasing the value will increase memory consumption, and high values will require a lot of system memory.
Please see the Refractive Index page for more information about caustics.
The examples below show the effect of increasing the Caustics quality for a scene with a Solid Glass material, lit by a Spotlight.
Sharp Shadows
This will allow sharp shadows to be cast across 3D geometry when the lighting scenario would create a sharp shadow. It is more accurate to have this checked and it is enabled by default. It is generally recommended to leave this on.

Sharper Texture Filtering
This will attempt to preserve detail in textures when viewed at grazing angles. For example, imagine being eye level with a wood table and seeing the wood grain compress together. Detail can get lost in the compressed areas. This setting reduces the loss of detail. This feature can increase render time so enable only when using textures with grazing angles.
Global Illumination Cache
Disabling Global Illumination Cache replaces the potential dirty shadows and black spots with noise. These artifacts can appear when the scene has transparent materials with diffuse surfaces behind them. Increasing Global Illumination Quality will reduce the noise. Increasing the Samples will also help in reducing the noise.
The examples below show the effect of toggling Global Illumination Cache for a scene with a Cloudy Plastic material.
Note
Because the Custom Control uses a different noise pattern, denoising will not have the same impact on your image as you experience in the Real-time view.
Limitation
Disabling Sharp Shadows for Custom Control also disables Global Illumination for rendering.